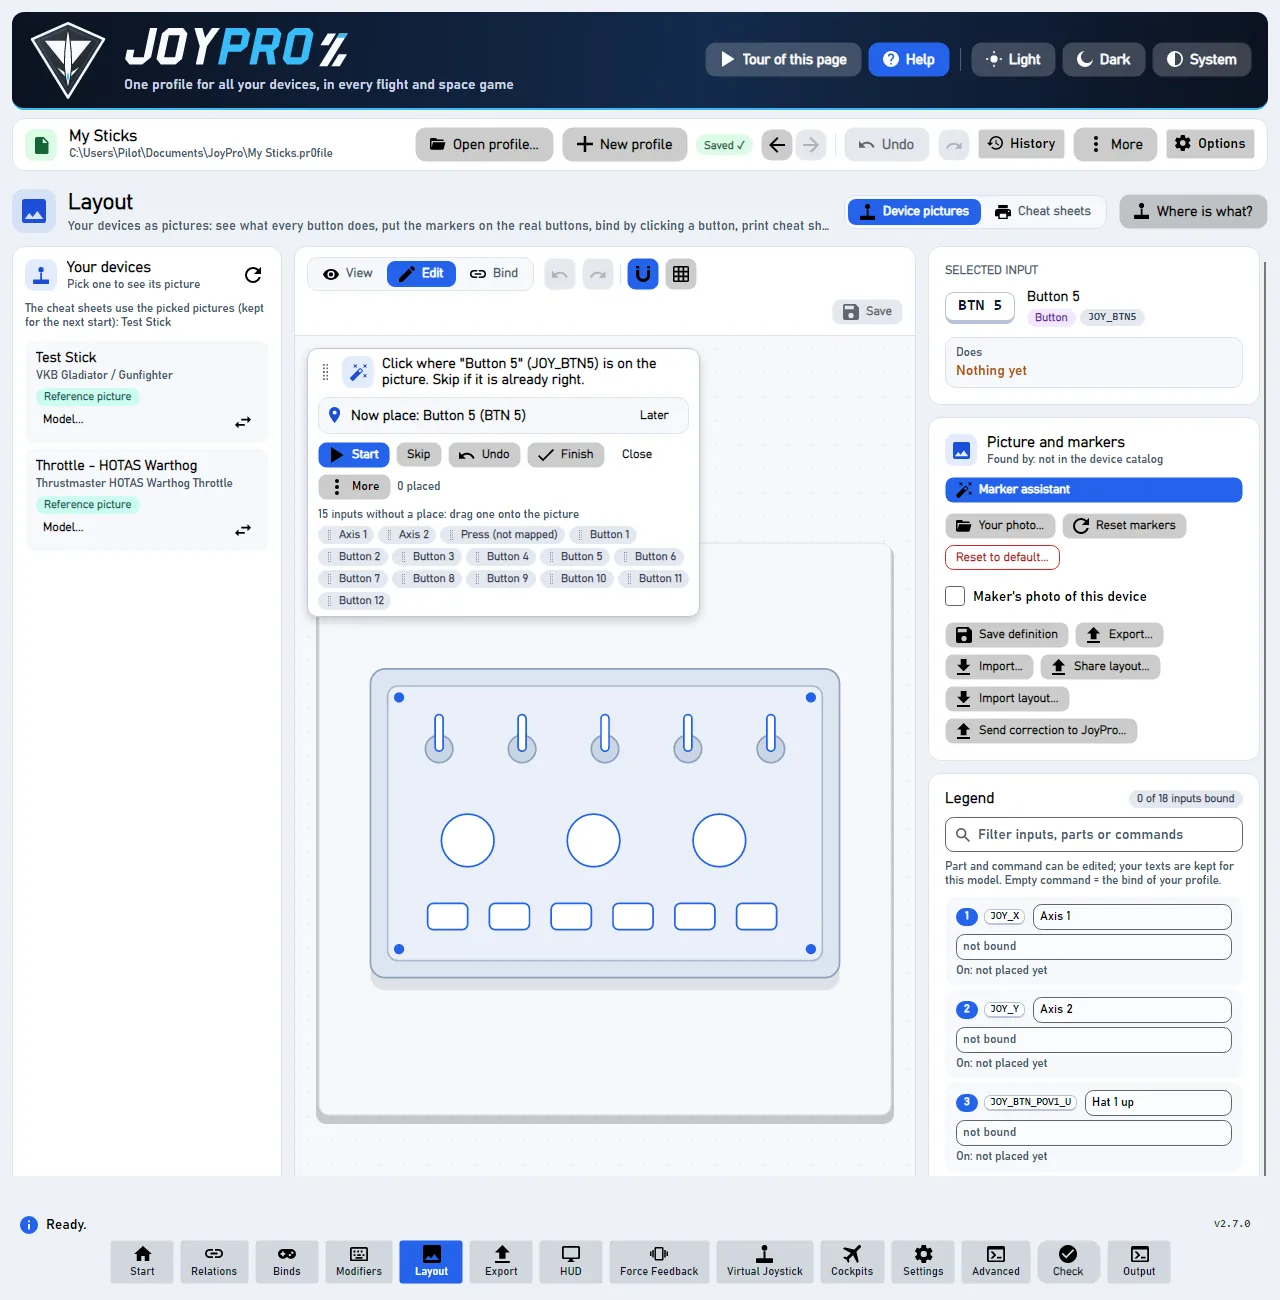
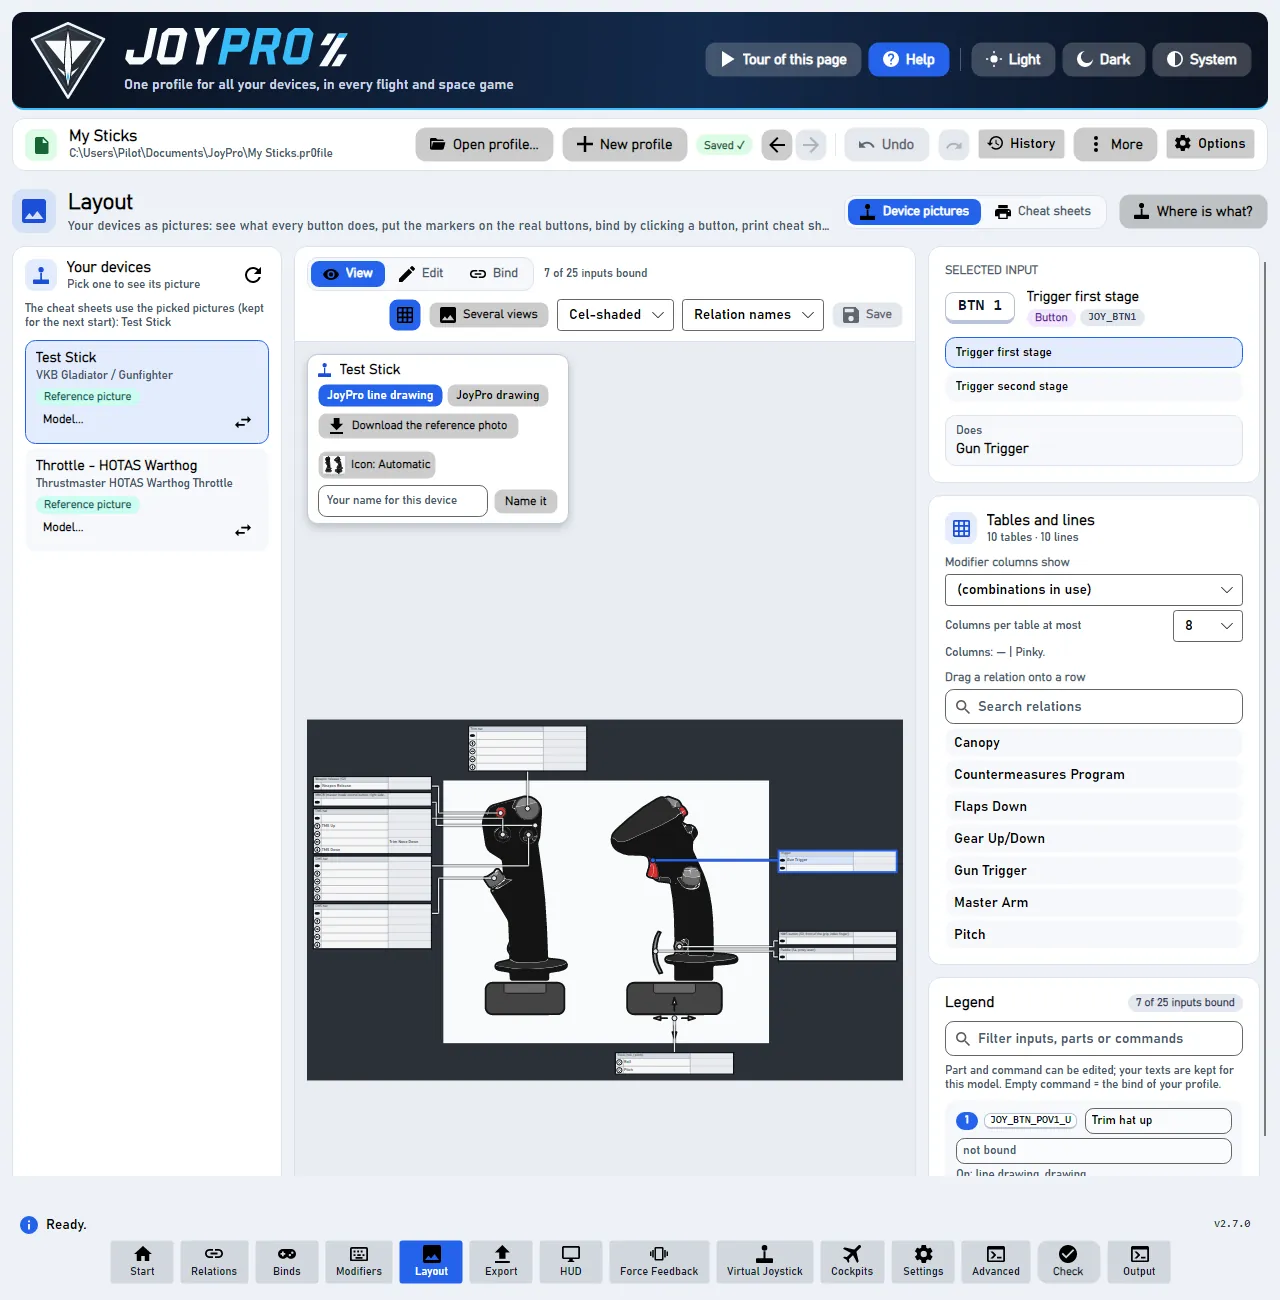
The Layout page shows a picture of each of your devices with what every button, hat and axis does. It has two
sections, switched at the top: Device pictures (one device at a time: look, fix the markers, bind on the picture)
and Cheat sheets (printable pictures of all your devices, per aircraft). Nothing on this page changes a game,
except a bind you make in Bind mode, which goes into your profile like any other bind.
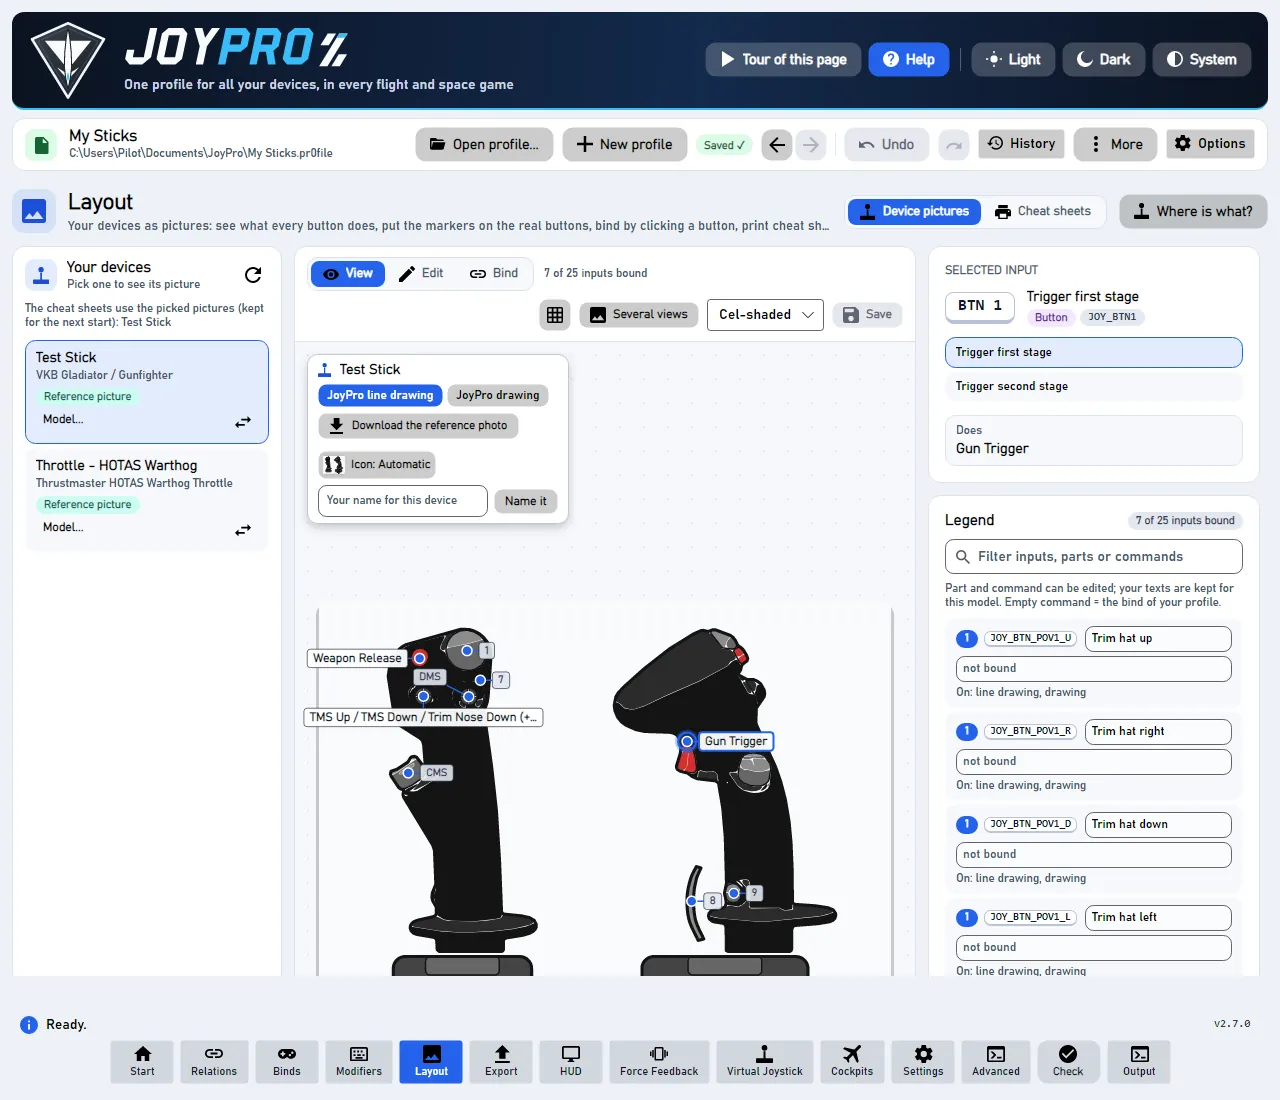
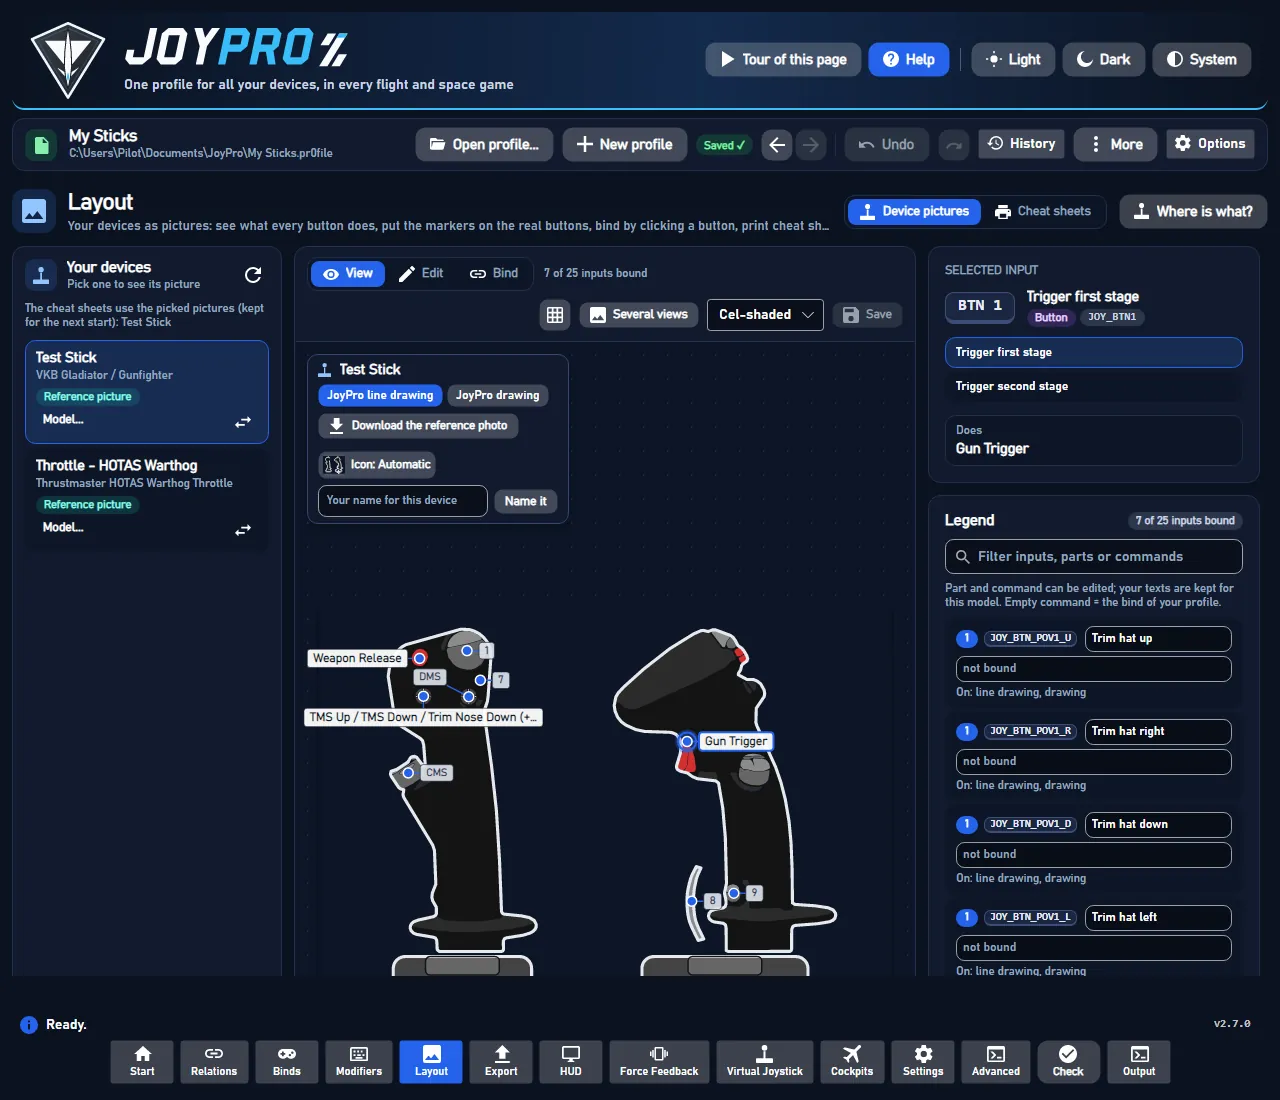
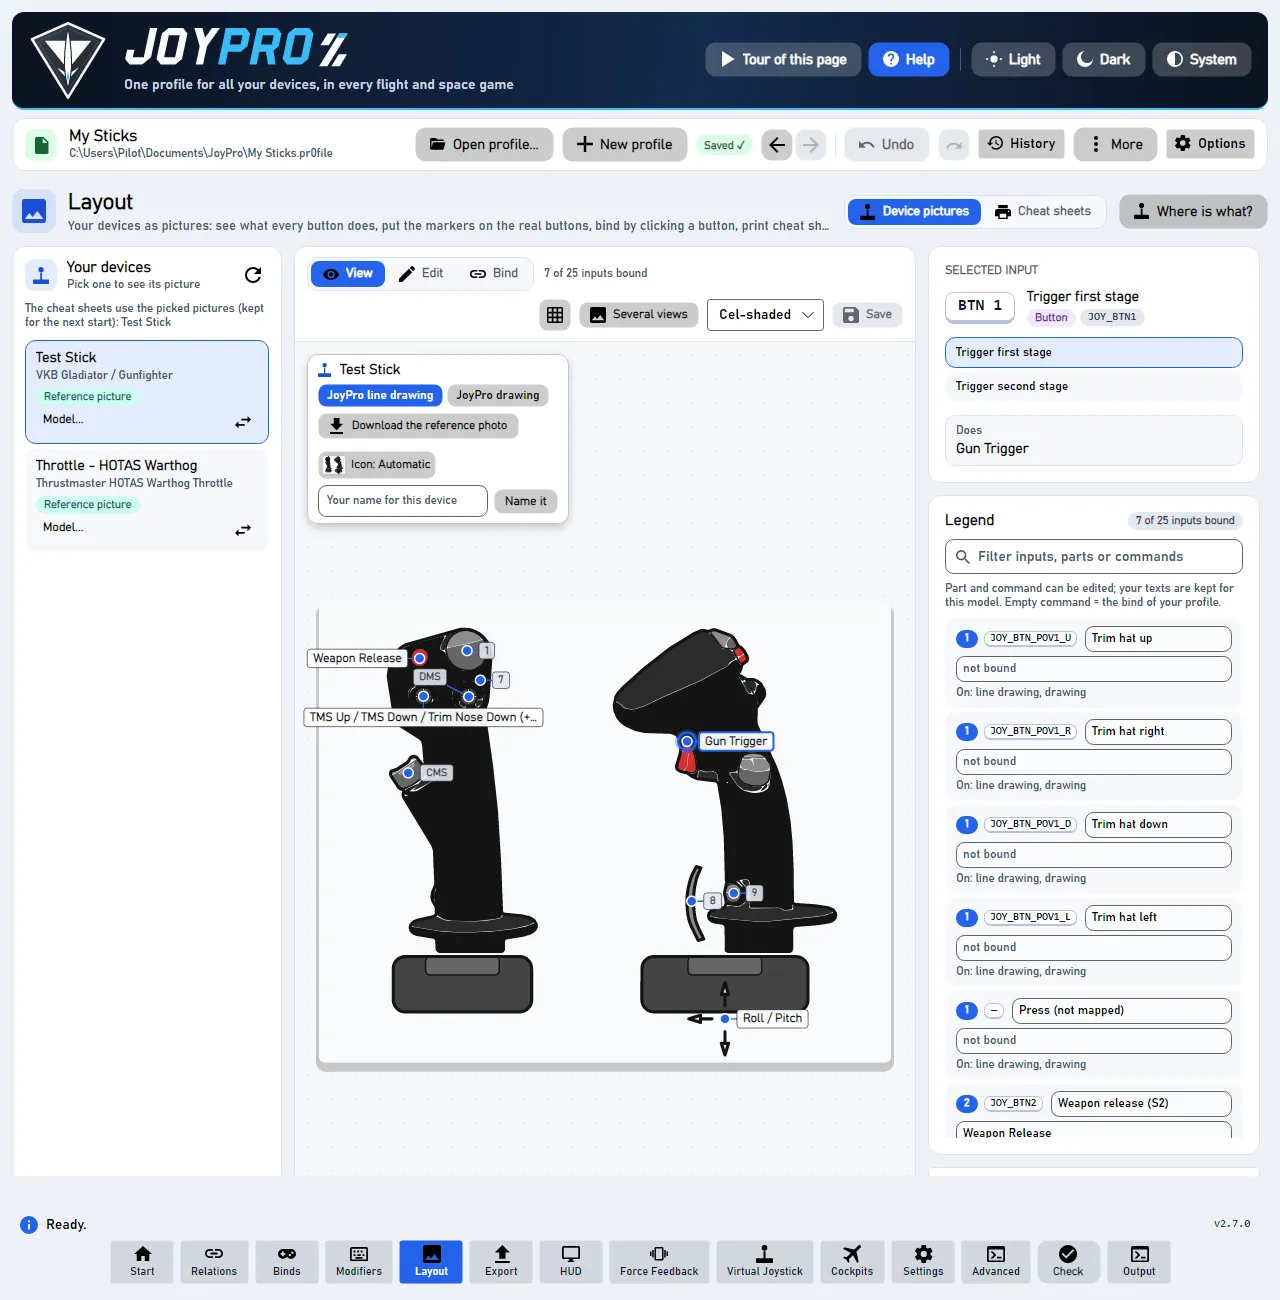
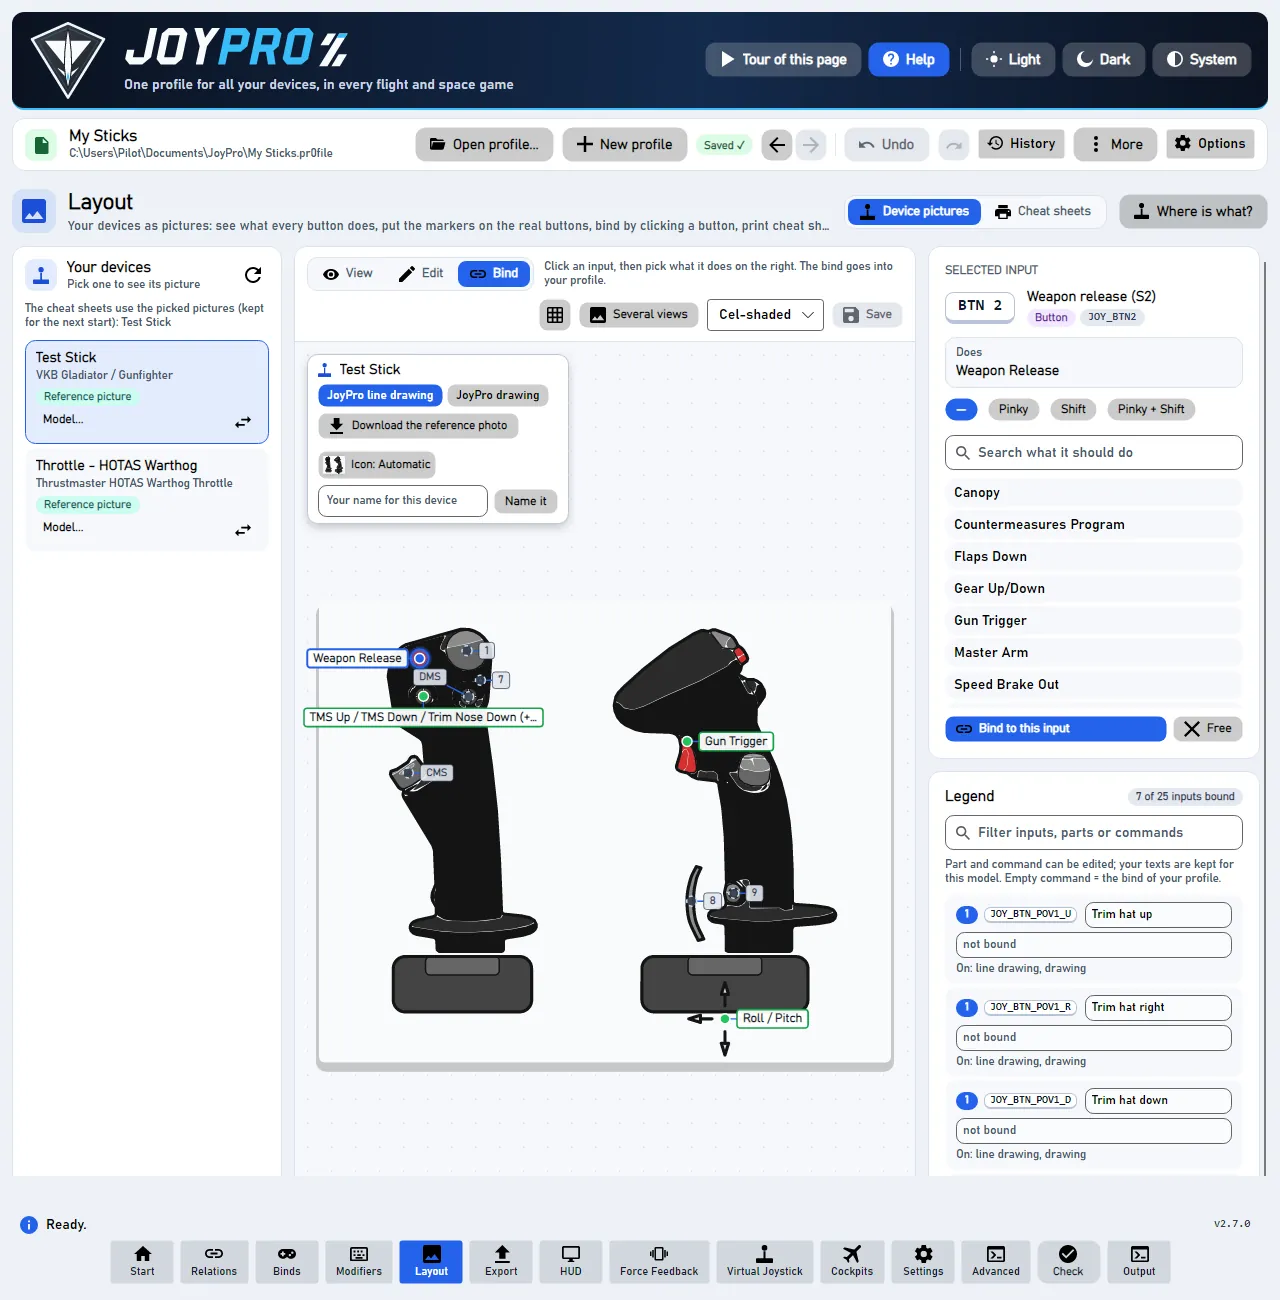
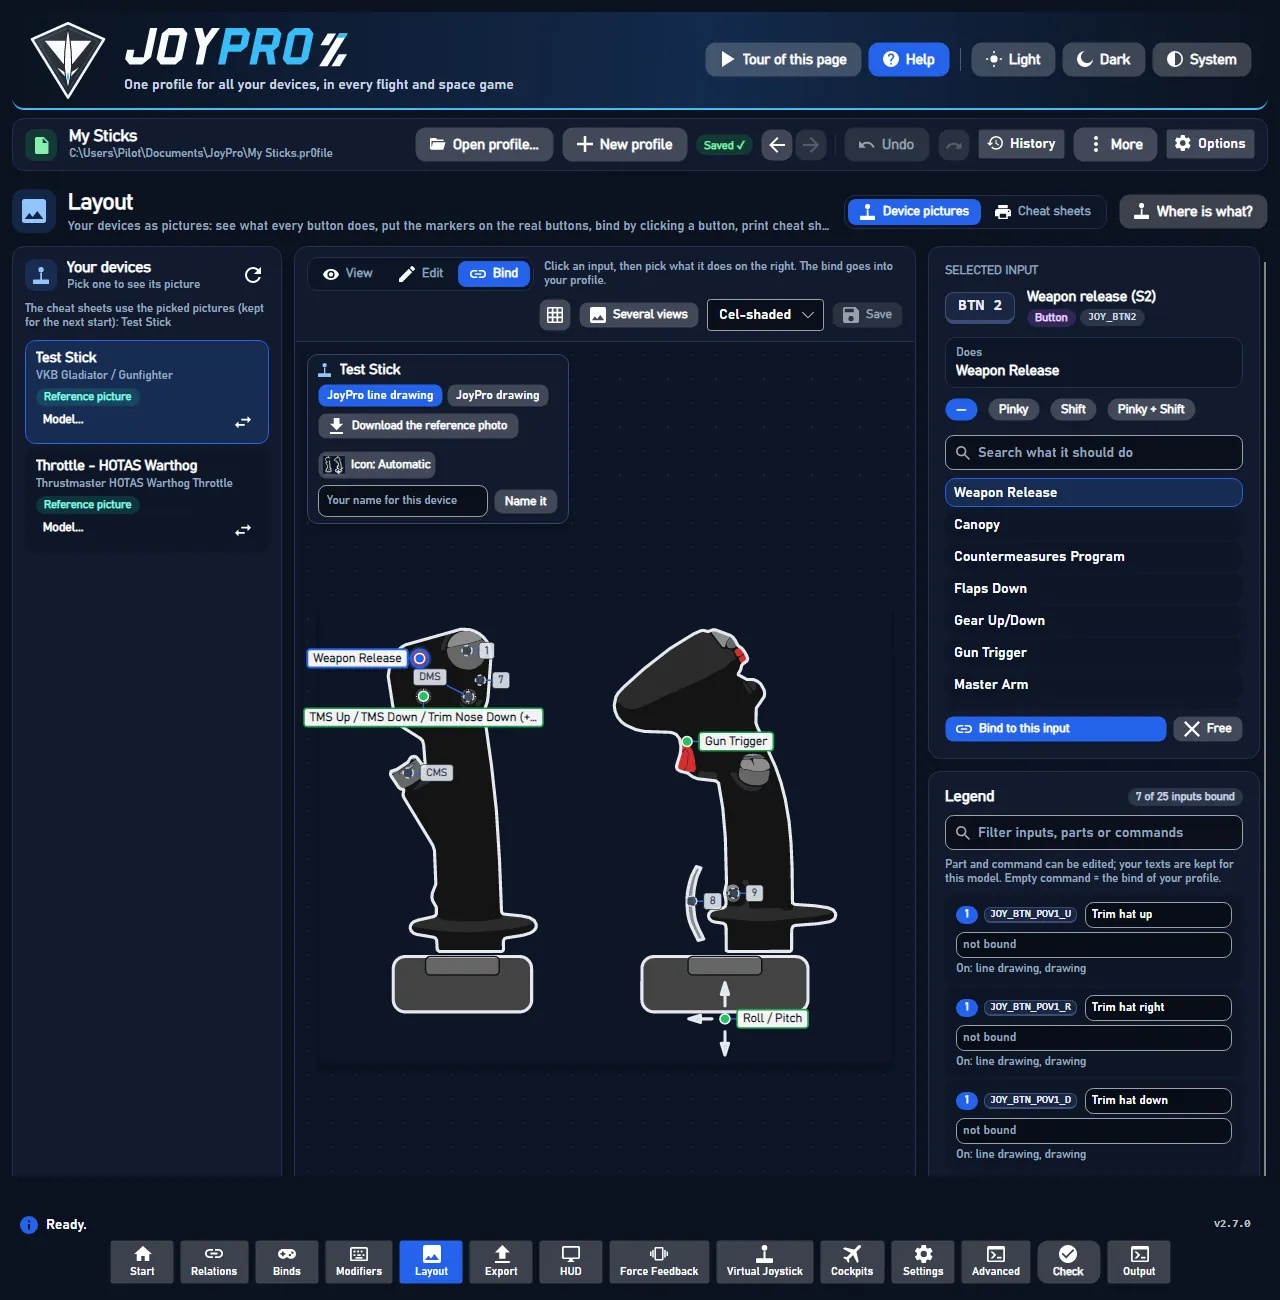
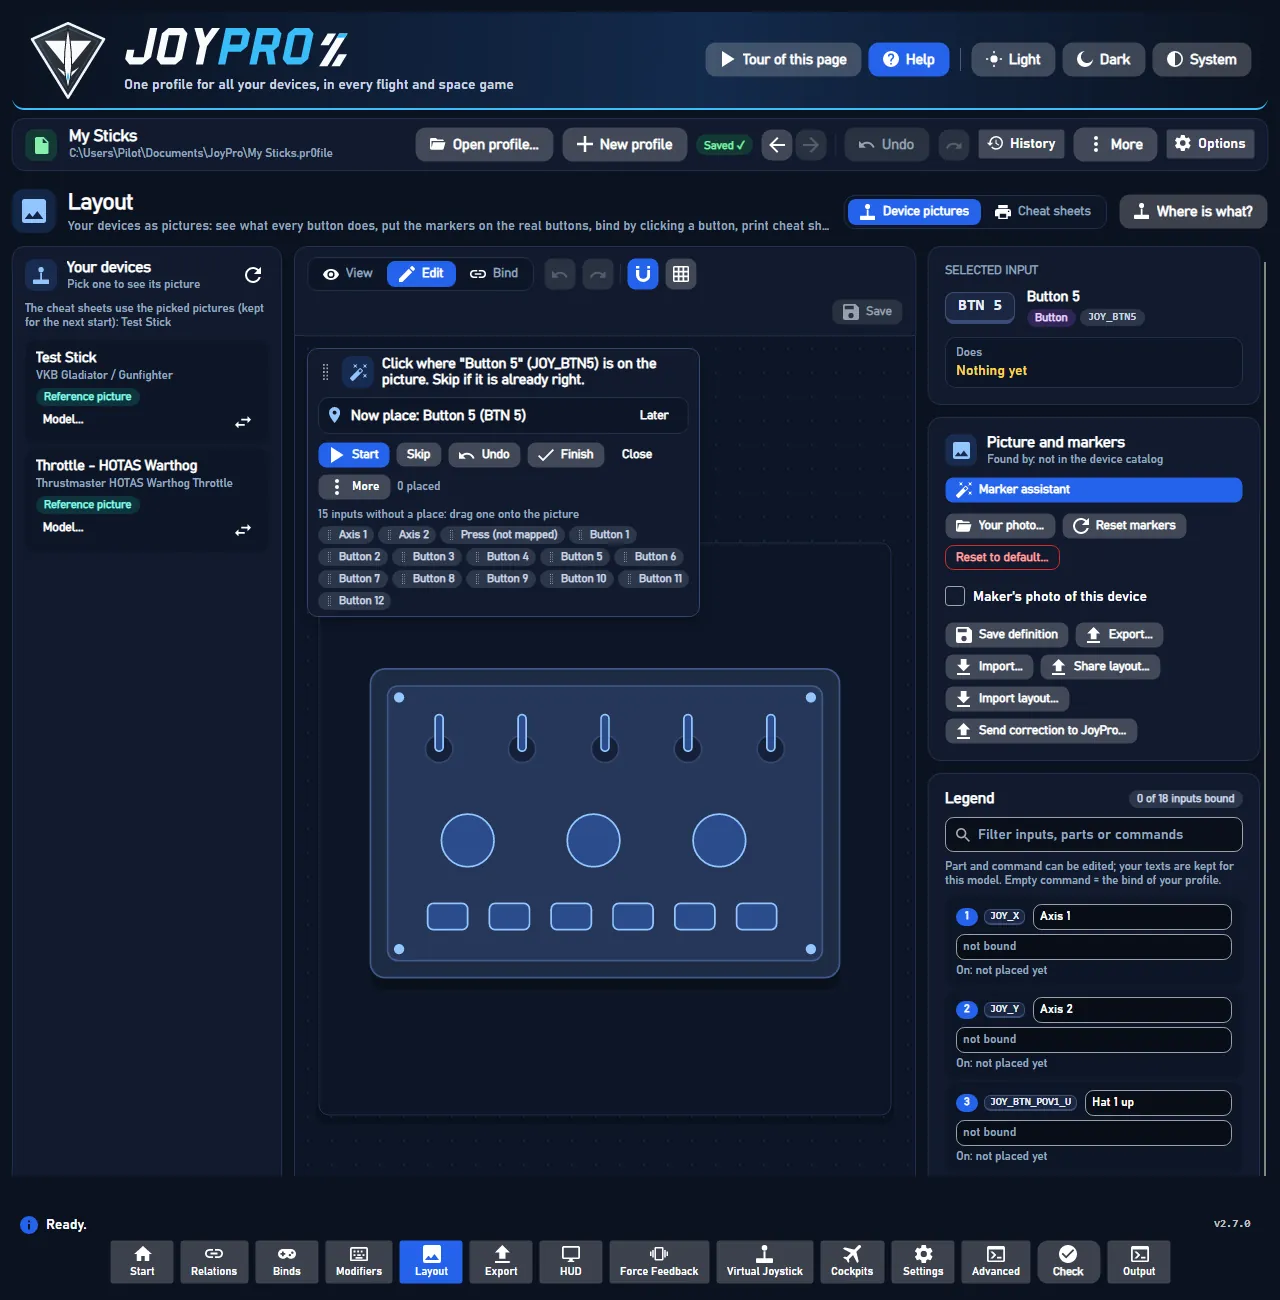
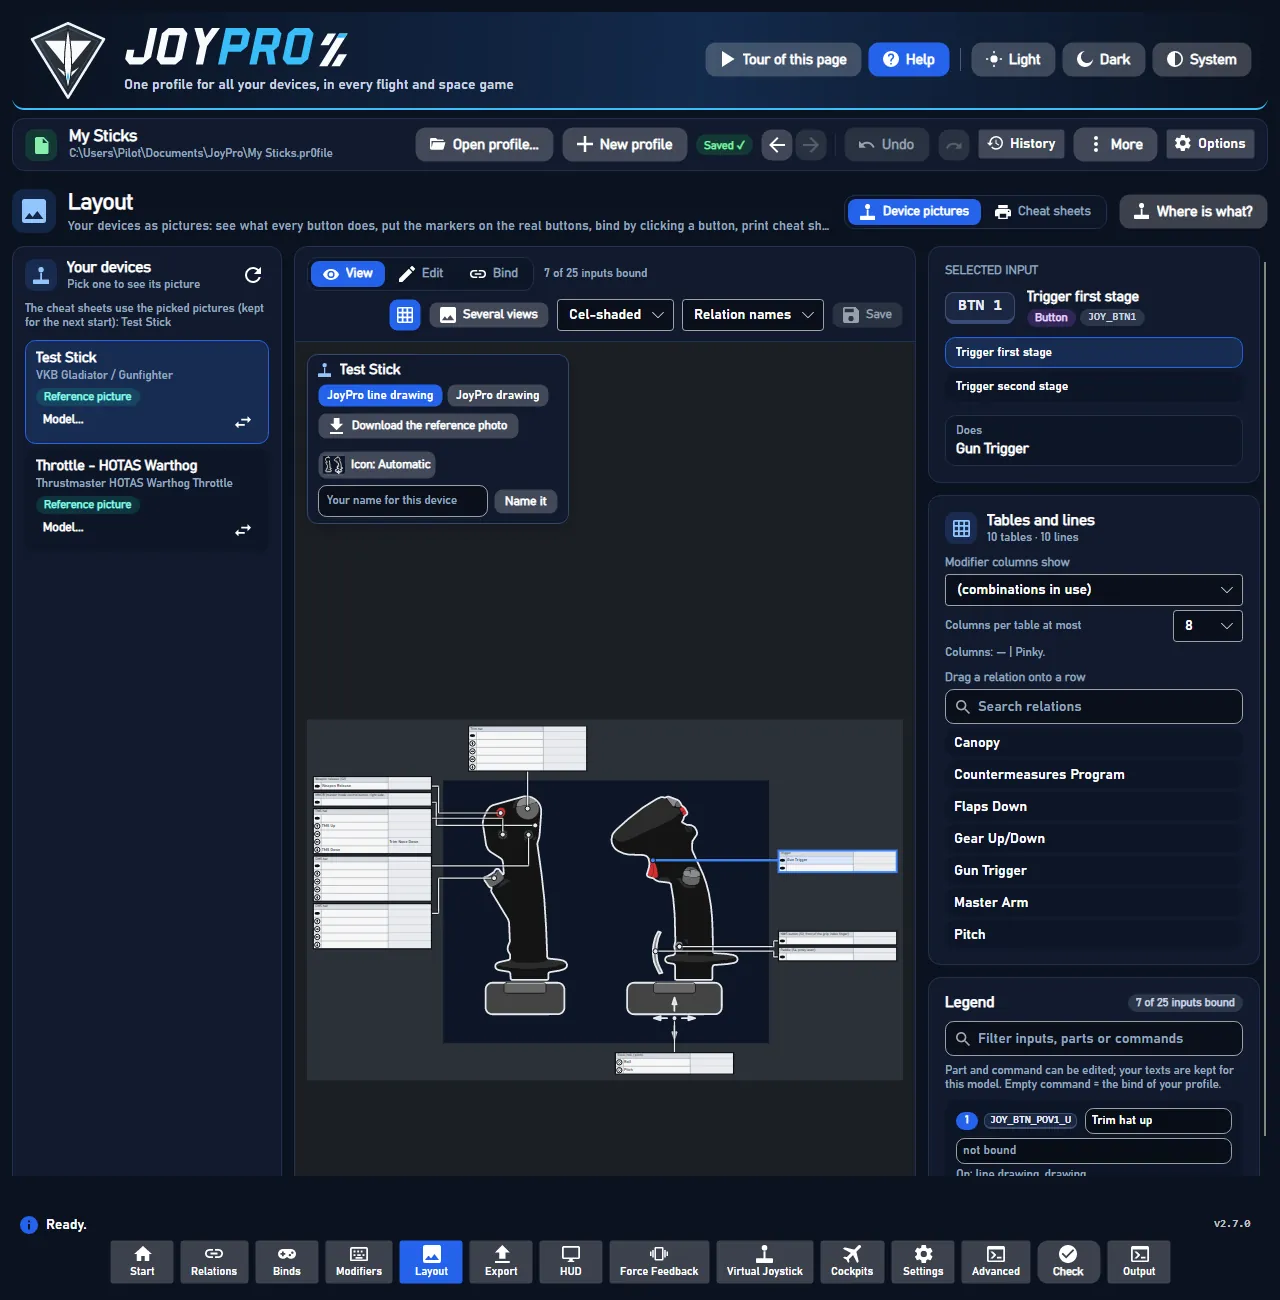
The Layout page: your devices on the left, the picture of the selected device with its markers and binds
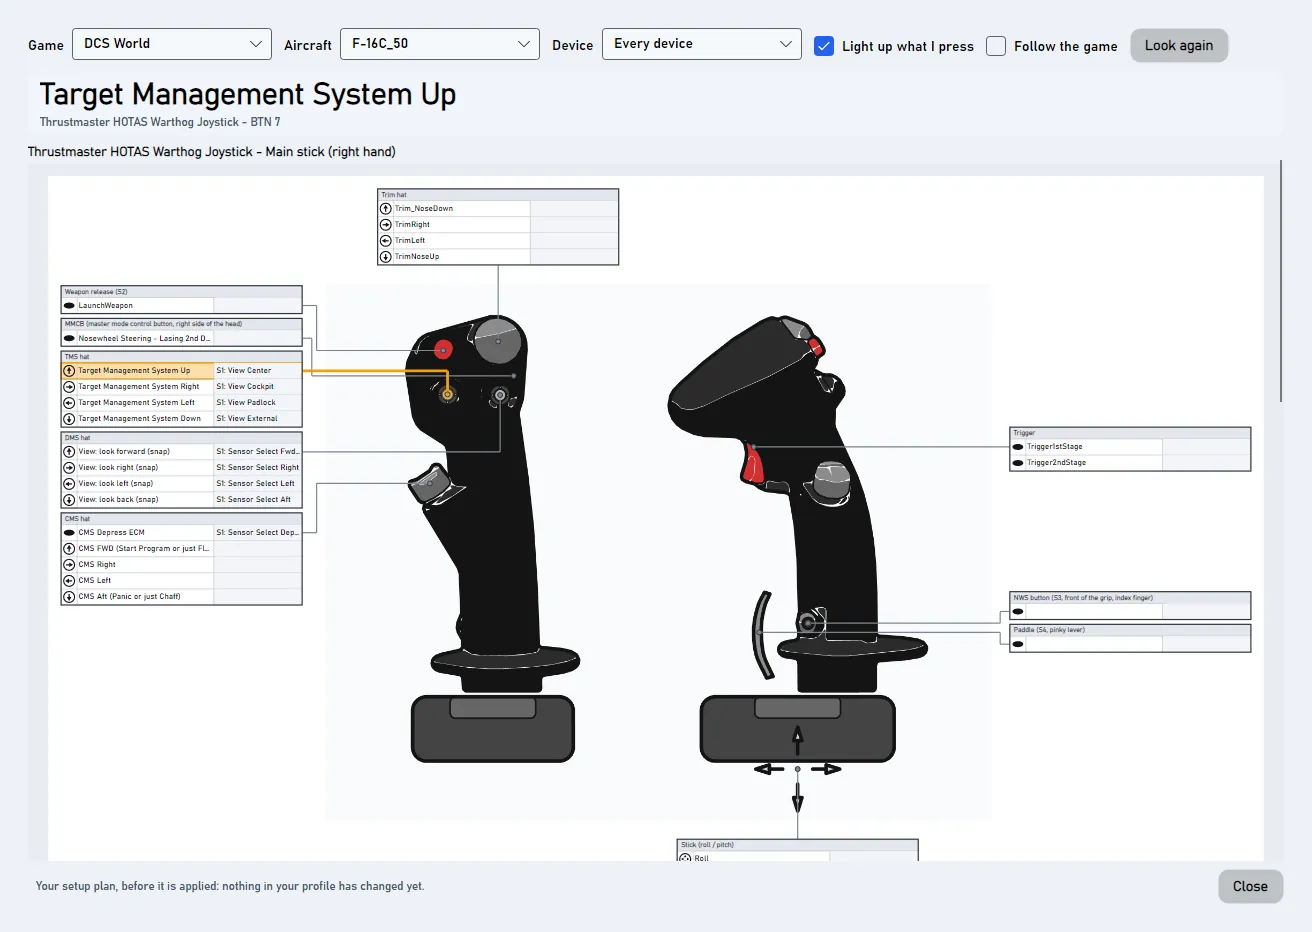
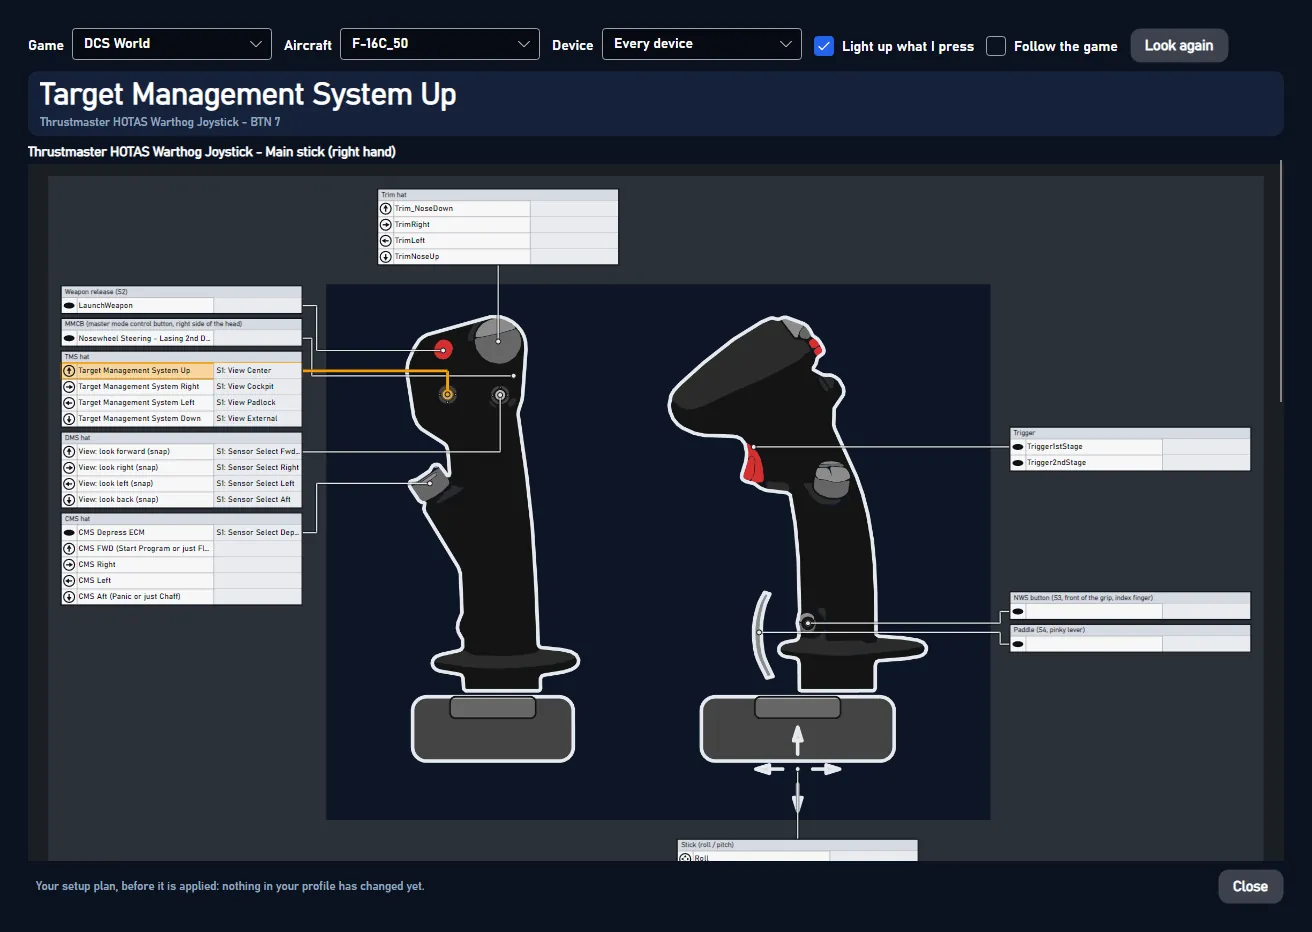
Where is what? opens a window with all your devices. Next to each control it says what the control does in your
game. You find it at the top right of this page, on the Start page and in the tray menu.
Pick a Game and an Aircraft.
Press a button or move an axis or hat. Its row lights up. Its function shows in big letters at the top.
Keep the window on a second monitor while you fly. It comes back where you left it.
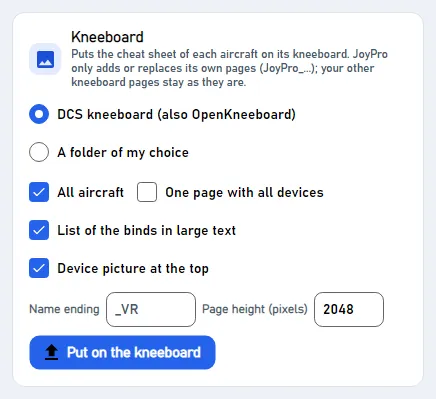
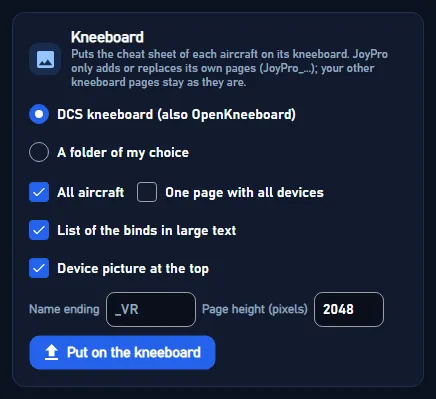
JoyPro can put a page with your binds on the kneeboard of each DCS aircraft. You read it right in the cockpit.
Press Cheat sheets at the top of this page.
Find the part Kneeboard. Keep DCS kneeboard (also OpenKneeboard).
Press Put on the kneeboard.
Start DCS, get into an aircraft and open the kneeboard. Your page is there.
Changed a button? Press Put on the kneeboard again: JoyPro replaces its own pages. Your other kneeboard pages stay.
More: See my binds on the DCS kneeboard.
Left: your devices. One card per stick, throttle, pedals or panel, with its model and "Your layout · 47
markers" or "Reference picture". Click a card to show its picture. Model... says which model it is (if JoyPro
guessed wrong); the swap button moves its binds to another device.
Middle: the picture. JoyPro's drawing of the device, the maker's photo or your own photo, with a label at every
input that says what it does ("Weapon Release", "Gear Up/Down").
Right: the selected input (click a label or a row of the legend) and the legend: every input of the device
with its bind, "7 of 25 inputs bound".
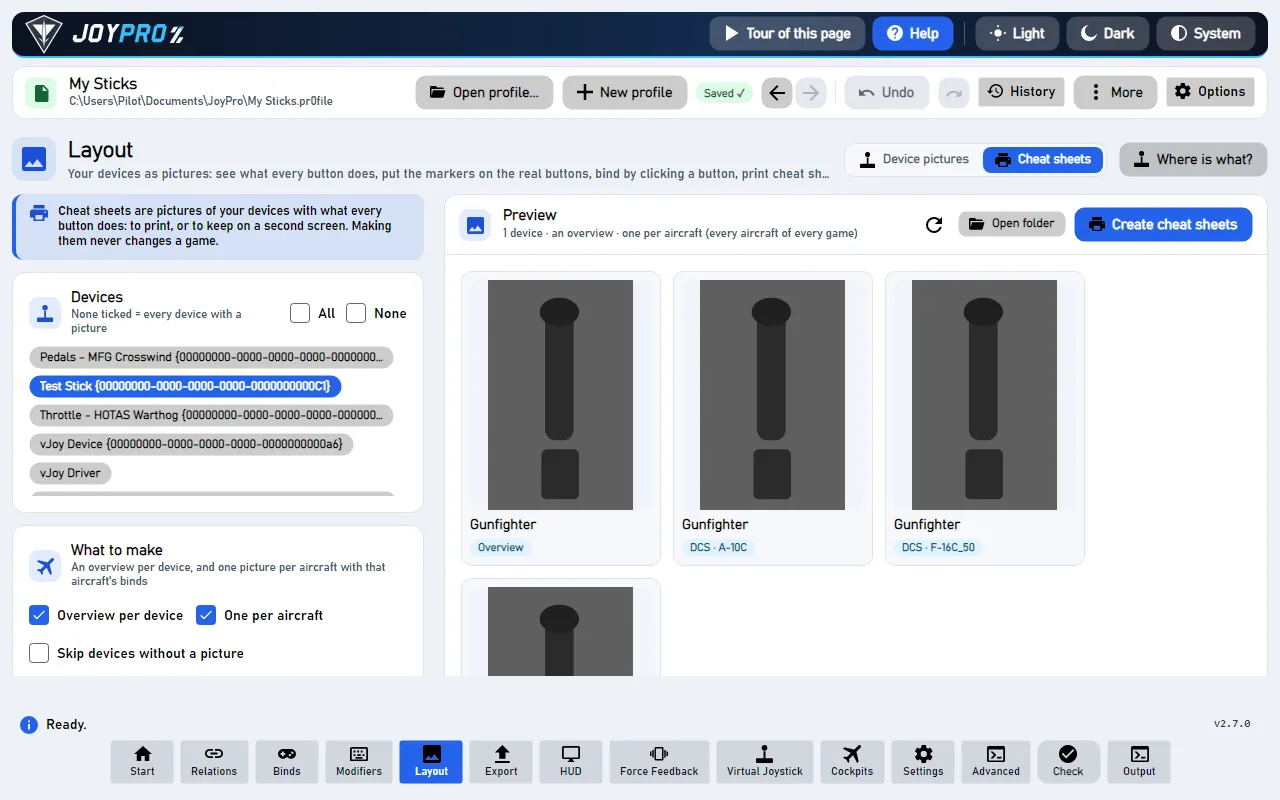
Pictures of your devices with every bind written next to the buttons, to print or to keep on a second screen. Tick the
devices, games and aircraft, choose Overview per device and/or One per aircraft, press Create cheat sheets.
The pictures (PNG) go into the output folder; the preview shows them.
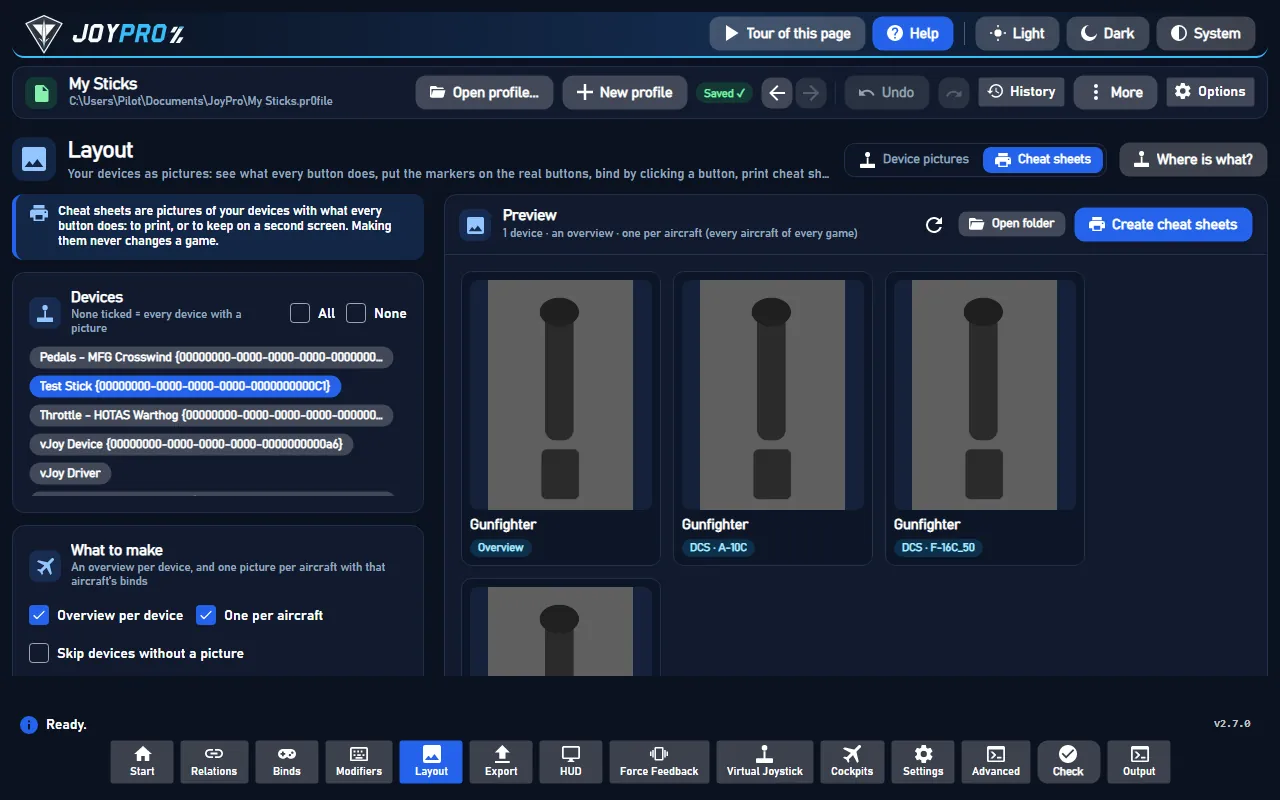
The Cheat sheets section
In the game: cheat sheets and Bind mode
A cheat sheet shows what the buttons do in one aircraft, with that game's own names for the commands when you pick it
in the preview box. A bind made in Bind mode is written into the game at the next export, like a bind recorded on
the Binds page.
Your own layout file (a JoyPro 1 layout, a picture you chose).
Your photo of the device.
The maker's reference photos (one per view), downloaded only after your yes.
JoyPro's drawing of the device.
The outline of its kind (stick, throttle, pedals ...).
The picture strip above the canvas has a button per picture of the device. The box next to the 3D button picks the
drawing style: Lines or flat colours under bold outlines (colours in Settings > Drawings). Devices with a 3D model
get 3D view: drag to turn, the wheel zooms, a double click resets. The flat drawing is what the cheat sheets print
and what Edit mode works on.
JoyPro identifies a device by its USB id, its name and the inputs it reports, against a catalog of several hundred
models. When it cannot tell (a base with exchangeable grips, one USB id for several products, an unknown device), it
asks over the picture: Which one is it? with tiles of the candidates, Most likely first, Keep the most
likely, Not listed: search the catalog, Not now. For an unknown device you also pick its kind. Model... >
Choose another model... asks again at any time.
When the shown picture knows no position of a part ("No positions on this picture yet"), the marker assistant places
them in a minute:
Place the markers (or Place them when only a few are missing).
Press a button or hat direction on the device (other devices are ignored), or More > Axis and move an axis.
Click the part's spot on the picture.
Repeat; Finish saves.
Without the device at hand, Now place: X names the next input; a click puts it there, Later asks for it after
the others, and the inputs without a place are chips you can drag onto the picture. Undo takes the last placement
back; Skip goes to the next input; Stop pauses. More holds Axis, Stop, Add control (a control JoyPro does
not know: button, switch, hat, mini-stick, encoder, axis) and Remove from picture.
The marker assistant on a button box JoyPro has no drawing of: place the inputs one by one
More > Detected spots (experimental) draws thin dashed rings on the spots of a photo that look like buttons, hats
or switches. A click (or a dropped chip) near a ring puts the marker on the ring's centre. JoyPro does not know which
input a spot is, so it places nothing by itself; it works on photos, not on JoyPro's drawings, and runs offline.
On a picture with known positions, Tables (toolbar) draws JoyPro 1's cheat sheet look: a table per group of
controls around the picture, lines to the parts, the bound relation per row and the modifier bind in a second column.
The preview box picks what the rows show: Relation names, or one game and aircraft with that game's own menu
titles. In Edit mode you drag a table (it gets pinned), its right edge, a line's segment or a spot; the side panel
has Modifier column, Row + / Row −, Pinned, Re-route line, Remove line, Split into single
tables, Group again, Auto arrange and Reset. A relation dragged from Drag a relation onto a row and
dropped on a row binds it there.
Several views puts more pictures of one device on a page (front and side, so every button is covered): Add
view, Your image..., Arrange, Edit this view, Remove view, Remove page, Back to one picture.
The page format is A4 or Letter for printing, 16:9 / 21:9 / 32:9 for a screen. The cheat sheets print the page.
When an input is missing or on the wrong spot, fix it in Edit mode (drag, Add control, Remove from picture,
rename in the legend). Everything is kept on this PC as your layer over JoyPro's data. Send correction to JoyPro...
saves the change as a small file and opens a prefilled issue form on GitHub; you decide there whether to send it.
Model... > Reset to JoyPro's default... removes all your changes of a device (asks first; Undo the reset puts
them back).
V / E / B modes, N place marker (layout file), Del remove, Ctrl+Z / Ctrl+Y undo and redo, Ctrl+S save, + / - zoom,
0 or F fit, arrows nudge in Edit mode (Shift: 10 px), Alt drags without snapping, a dropped picture file becomes your
photo of the device.
flowchart TD
  D["Device<br/>(USB id, name, inputs)"] --> I["DeviceIdentifier<br/>+ device catalog"]
  I --> R["Device reference:<br/>model, parts, pictures"]
  R --> C["DeviceMarkerCanvas<br/>(View / Edit / Bind)"]
  P["Profile binds<br/>(binds list)"] --> C
  C --> B["binds set"]
  R --> S["Callout sheet:<br/>tables and lines"]
  S --> L["layout render:<br/>a PNG per device<br/>and aircraft"]
  S --> K["layout kneeboard:<br/>DCS Kneeboard or<br/>OpenKneeboard"]
From a connected device to its picture, a bind, the cheat sheets and the kneeboard pages.
View models: MainWindowViewModel.LayoutWorkspace.cs (modes, undo, bind and free), LayoutReference.cs (the
reference picture, save, assistant host), LayoutCallouts.cs (tables and lines), MultiView.cs,
CheatSheets.cs, ReferencePhotos.cs, Device3D.cs, DeviceIcons.cs, ModelChoice.cs, LayoutReset.cs,
UnmappedPress.cs; DeviceReferenceViewModel*.cs, MarkerAssistantViewModel.cs, SheetStyleViewModel.cs. The
canvas: Views/Controls/DeviceMarkerCanvas.cs, CalloutSheetCanvas.cs, MultiViewCanvas.cs.
On this PC (<data>\DeviceReference): grips.json (model answers), Layouts\ (your positions per picture),
Callouts\ (tables and lines), MultiView\, ReferencePhotos\<model>\ (checked by SHA-256), Corrections\,
ResetBackups\; your device definitions in <data>\Devices. The global sheet style in sheet-style.json.
152 controls, read from the program’s source: 152 written, 0 with the facts from the source (tooltip, code comment, engine call), 0 still to be expanded.
Gives the shown device a style of its own (a copy of the global sheet style to change): colours, font and markers of
its cheat sheet. It is stored with the device's sheet (or next to its .layout file) and travels with Share layout....
Unticked, the device uses the global style again.
Tooltip Takes over every colour, the font and the drawing of the preset
Gives the sheet style (the global one, or the shown device's own style when it has one) every colour, the font and the
drawing of the preset picked above. The editor and the cheat sheets use it at once; it is saved right away.
Tooltip Keeps this style under the name, to apply it again later
Keeps the current sheet style as a preset under the name typed above, to apply it again later (in both style panels).
A name of JoyPro's presets is refused; your preset of the same name is replaced.
Adds a row for a modifier colour ("Modifier 1" with the next colour of a palette). Type the modifier as your binds name
it (LAlt, Shift A): its markers and the bar over its column get that colour.
Tooltip Press a button, move an axis or a hat: its row lights up and its function is named at the top. Reads your devices only while this window is open.
Layout window, on by default: press a button, move an axis or a hat and its row lights up; its function is named in big
letters at the top. JoyPro reads your devices only while the window is open and not minimized, and after a moment
without input only every 250 ms.
Tooltip Switches to the game you are playing and, in DCS, to the aircraft you fly (needs JoyPro's DCS hook). Without it your choice stays.
Layout window: switches to the game you play and, in DCS, to the aircraft you fly (JoyPro's DCS hook tells it; other
games are found by their running program every 10 seconds). Without that your choice stays.
Closes the layout window. JoyPro remembers where it was (monitor, place, size) and what it showed; it opens there next
time. Left open when JoyPro closes, it comes back with the next start.
Tooltip Every device with what each control does in one game and aircraft, in a window of its own (for a second monitor too); what you press lights up
Where is what? opens the layout window: a window of its own (also for a second monitor) with every device and the
function on each control for one game and aircraft. What you press lights up. Also on the Start page and in the tray
menu.
From the code The Layout page and the tray: the profile's binds.
Find my devices (the refresh button above the list, or Suggest): looks for a picture of every connected device
(and of the profile's devices, as ticked under Where JoyPro looks) and lists them on the left. Engine:
engine layout suggest.
Tooltip Which model this device is (choose another one, say it is not your device, undo the last choice) and Reset to JoyPro's default
Opens the device's model menu: Choose another model..., This is not my device, Undo the last model choice,
Reset to JoyPro's default... and, after a reset, its undo.
Asks Which one is it? again for this device, with its candidates (its identification, the grips of its base, the
models of its USB id and maker), and a catalog search one click away. Use it when JoyPro shows the wrong model.
Says the shown model is wrong: the device is treated as unknown and kept as its kind (stick, throttle ...) until you
pick its model in the question over the picture.
Tooltip Everything you changed of this device's picture goes: marker positions, tables and lines, renamed parts, your photo, your definition and the layout file the profile uses. Asks first; Undo reset puts it back.
Removes everything you changed of this device's picture: marker positions, tables and lines, renamed parts, your photo,
your own definition, and the layout file the profile uses (the file itself stays). Asks first; Undo the reset puts
it all back. Engine: engine layout image--clear.
"Undo the reset of ": puts back everything Reset to JoyPro's default... moved away (marker positions,
tables and lines, renamed parts, your photo, your definition and the profile's layout file, engine layout image --set).
#Replace this device: move its binds to another device, input by input
Buttonwritten
Opens Replace device with this device as the old one: its binds move to another device input by input, with a
preview first. Needs an open profile; applying is one change in the History. Engine: engine devices replace.
From the code The window, with the card's device as the old device (or empty to pick one).
Tooltip Your JoyPro 1 layouts (.layout files with your pictures): JoyPro copies them and shows them for the devices they were made for. The old folder is only read.
Picks your JoyPro 1 folder (or its LayoutImages folder): JoyPro copies the .layout files with your pictures and shows
them for the devices they were made for. The old folder is only read.
Tooltip Opens an image search for the selected device's vendor and model
Opens an image search for the selected device's maker and model in your browser. Save a good picture (or copy its image
address), put it into the box below and press Use picture. Engine: engine layout identify.
From the code Opens an image search for the device's vendor and model (from VID:PID and HID name, see "layout identify").
Builds a layout on the picture you chose (file or image address): the engine puts the device's real buttons and axes on
it as markers and, with a profile open, stores it as the device's layout for the cheat sheets. Engine: engine layout suggest --device <d> --backdrop <picture> --apply.
Tooltip Opens the folder in Explorer (JoyPro creates it if needed)
Opens the folder for community cheat sheets you received (JoyPro creates it if needed). Picture files you put there
are offered as 2D layouts of their devices in the picture strip.
Tooltip Use the picked pictures for the cheat sheets
Uses the picked suggestions' layout files for the cheat sheets and ticks those devices there (with nothing picked: every
suggestion that has a layout file). The picks are kept for the next start, until the device's picture is reset or
another layout replaces it.
Opens the layout file of the picked suggestion in the layout-file editor (markers, tables and lines of a .layout, JoyPro
1 style): it loads the file and shows it on the canvas. Engine: engine layout template-inspect.
Switches the picture's mode: View (V) shows what every input does, Edit (E) moves markers and opens the edit
tools, Bind (B) binds a relation to a clicked input.
From the code "view", "edit" or "bind" (the mode buttons and the keys V, E, B).
#Place marker: click on the picture to put a new marker there (N). The input and type come from the panel on the right.
Toggle buttonwritten
Place marker (N, layout files in Edit mode): the next click on the picture puts a new marker there, with the input,
type and modifiers set in the panel on the right.
#Snap to the other markers (hold Alt to drag freely)
Toggle buttonwritten
Dragged markers snap to the other markers (on by default). Hold Alt while dragging to place one freely. Kept for the
next start, like the other switches of this bar.
#Tables and lines: show the legend tables and connector lines of the cheat sheets on the picture (edit them under 'Tables, lines and label style' on the right)
Toggle buttonwritten
Shows the legend tables and connector lines of the layout file on the picture, the way the cheat sheets draw them; edit
them under Tables, lines and label style on the right. Kept for the next start.
#Tables: tables around the picture with lines to the parts (JoyPro 1's cheat sheets); off: labels at the markers
Toggle buttonwritten
On (default): tables around the picture with lines to the parts, like JoyPro 1's cheat sheets. Off: labels at the
markers. Offered on pictures with known positions. Kept for the next start.
From the code Tables and lines (on) or the markers with labels (off) on a reference picture.
#Several pictures of this device on one page (e.g. front and side, so every button is covered), each with its tables and lines; for printing or a screen. The cheat sheets print the page.
Buttonwritten
Several views: opens the device's page with several pictures (front and side, so every button is covered), or
starts one with the shown picture. The picture needs placed markers first. The cheat sheets print the page. Engine:
engine layout multiview.
From the code "Several views": the device's page, or a new one that starts with the picture shown.
Tooltip Turn the device around (drag; wheel zooms; double click resets): JoyPro's render of a 3D model of the device. Off: the flat drawing, which is what the cheat sheets print and what Edit mode works on.
Shows JoyPro's 3D view of the device: drag to turn it, the wheel zooms, a double click resets. Off: the flat drawing,
which is what the cheat sheets print and what Edit mode works on. Kept for the next start.
Saves the shown picture: the marker positions, tables and lines (the cheat sheets use them from then on); for a layout
file it writes the file. The autosave also keeps them; Save clears the edit undo.
Downloads every reference photo JoyPro knows for these connected devices, in the background with a progress bar; each
is checked against JoyPro's record. It counts as your yes for these devices.
Tooltip Download the reference photos of every device that appears, in the background (Settings > Privacy)
Downloads the offered reference photos now and switches on Download reference photos automatically (Settings >
Privacy): the photos of every device that appears are downloaded in the background from then on.
Tooltip Another picture of the device on the page: JoyPro's drawings and photos of it, or your own image
Lists the device's other pictures (JoyPro's drawings and the photos) that are not on the page yet; the one you pick is
added with its markers, tables and lines. A picture without placed markers cannot be added.
Tooltip Its markers, tables and lines in the normal editor (the page shows them after)
Opens the selected view's picture in the normal editor (Edit mode) to change its markers, tables and lines; the page
shows the changes afterwards. Not for images of your own.
From the code "Edit this view": the view's picture in the normal editor (markers, tables and lines); the page shows it after.
Removes the page with several views (asks first). The device shows its one picture again; the views' markers, tables
and lines stay with their pictures.
Shows this picture of the device: your layout, your photo, a maker's photo, JoyPro's drawing or a 2D layout. Picking a
reference picture instead of a 2D layout gives the device its earlier layout back.
From the code A view of the picture strip clicked.
Tooltip Download the maker's product photo this drawing was made from (stored on this PC only, never shipped)
Downloads the maker's product photo this drawing was made from, kept on this PC only. Without your yes for this model it
asks first and downloads after a Yes. The photo then shows, with JoyPro's markers when they fit it.
From the code "Download the reference photo": with the consent for this device at once, else the consent question first (the download follows a yes).
Answers the question about the maker's photo: Yes downloads and shows it for this model, No keeps JoyPro's
drawing, Always for all my devices allows the photos of every device, Never stops them all (and forgets the
yes answers). Settings > Privacy changes it back.
From the code Yes / No for this device, Always for all my devices, Never.
Tooltip The device's icon on the device cards, in the bind list and on the HUD: pick one of its pictures or a picture of your own
Opens the icon picker: one tile per picture of the device (line drawings also cel-shaded and two-colour), Automatic,
and Your own picture.... The icon shows on the device cards, in the bind list and on the HUD.
Keeps the name typed in the box as your name for this device (Enter does the same). JoyPro shows it everywhere instead
of the device's name; the games keep getting the real device. Needs an open profile and is a change in its History.
Engine: engine devices alias set.
Engineengine devices alias clear · engine devices alias set
Tooltip Press a button or hat direction on the device next
The marker assistant waits for the next press: press a button or hat direction on the shown device (presses of other
devices are ignored), then click its spot on the picture. After 30 seconds without a press it stops and says so.
Takes the marker assistant's last placement back: the part goes to where it was before, or back among the chips when it
had no place. Ctrl+Z on the page does the same.
Tooltip Save the markers (and your device definition)
Stops the marker assistant and saves the marker positions of the shown picture. When the device was unknown or got new
inputs, it is also saved as your device definition (Export... shares it).
From the code Saves what the assistant did: the marker positions of the shown picture, and the user's definition when the device was unknown or got new inputs.
Tooltip Rings on the spots of the photo that look like buttons, hats or switches; a click near a ring puts the marker on its centre. JoyPro does not know which input a spot is.
Draws dashed rings on the spots of a photo that look like buttons, hats or switches; a click (or a dropped chip) near a
ring puts the marker on its centre. JoyPro does not know which input a spot is, so it places nothing by itself.
Tooltip Press (or move) each input of the control on your device, then click its spot on the picture
Adds a control JoyPro does not know, of the kind picked in the box (button, switch, hat, mini-stick, encoder, axis,
wheel): press or move each of its inputs as asked, then click its spot on the picture. Finish saves it as your
device definition.
From the code Adds one control of the chosen kind: press (or move) each of its inputs in turn, then click its spot.
Tooltip Take the picked part off the picture (JoyPro put it on the wrong spot)
Takes the picked part off the picture (JoyPro put it on the wrong spot): it is not shown there any more. Place it again
with Start or a click after picking it; Undo brings it back.
From the code Takes the selected part off the picture (JoyPro placed it wrong and the user does not know where it is).
Downloads the 3D views of these connected devices from JoyPro's releases (checked, kept on this PC); 3D view then
appears on the Layout page and the Bind page's picture.
Tooltip Download the 3D views and cockpit pictures from JoyPro's releases without asking (Settings > Privacy)
Downloads the offered 3D views now and sets Pictures from JoyPro's releases (Settings > Privacy) to always: 3D views
and the Cockpits page's picture packs are downloaded without asking from then on.
Tooltip Do not look for 3D views and cockpit pictures in JoyPro's releases (Settings > Privacy); the flat drawing stays
Sets Pictures from JoyPro's releases (Settings > Privacy) to never: JoyPro stops looking for 3D views and cockpit
picture packs; the flat drawing stays.
Tooltip Saves your positions and controls as a small file and opens a prefilled issue form on JoyPro's GitHub page; you decide there whether to send it
Saves your positions and controls (what differs from JoyPro's data) as a small file and opens a prefilled issue form on
JoyPro's GitHub page in your browser; you decide there whether to send it. Nothing is sent by JoyPro itself.
From the code "Send correction to JoyPro": saves the correction file and opens the prefilled issue form; the user decides in the browser whether to submit it.
Tooltip Press each button of the device and click where it is on the picture; for unknown devices it also names the parts
Opens the marker assistant over the picture (switches to Edit mode): press each button of the device and click where
it is. For unknown devices it also names the parts. Every placement can be undone with Ctrl+Z.
Tooltip A layout someone shared (joypro-device-layout .json)
Imports marker positions someone shared (a joypro-device-layout .json): they are kept for their model and photo, with
the tables and lines, a photo inside the file and a page with several views when the file has them.
For a device JoyPro does not know: says what kind of device it is (stick, throttle, pedals, panel ...). "Likely" marks
JoyPro's guess. The picture then shows the outline of that kind and the marker assistant can name its parts.
Tooltip A new marker in the middle of the picture (or switch on 'Place marker' and click the spot)
Adds a marker in the middle of the layout file's picture with the input, type and modifiers set below (or switch on
Place marker and click the spot). Ctrl+Z takes it back.
Tooltip Give the selected marker this input, type and modifier
Gives the selected marker of the layout file the input, type and modifiers set above. An input another marker already
has is refused. Ctrl+Z takes it back.
Picks the modifier combination the next bind gets (none, one modifier, several held together). Bind to this input
binds with it, and the list shows what fits.
From the code A modifier combination clicked in the side panel: "Bind here" binds with it.
Binds the relation picked in the list (or on the left) to the selected input, with the picked modifier combination. The
input's earlier relation is freed first; buttons take button relations, axes axis relations. The change goes into your
profile and its History. Engine: engine binds set. In the game: written at the next export.
From the code Binds a relation to the selected input ("Bind here"): the parameter, else the one picked in the side panel's list, else the relation picked on the left (Bind Studio). With the picked modifier combination on a reference picture.
Removes the bind from the selected input: the relation keeps its other settings but loses this input. The change goes
into your profile and its History. Engine: engine binds clear--input-only. In the game: gone after the next export.
Tooltip JoyPro's arrangement again: also pins, widths, rows and bent lines (Undo brings yours back)
Puts back JoyPro's arrangement of the tables and lines, also pins, widths, rows and bent lines; the choice of modifier
combinations and the sheet style stay. Ctrl+Z brings yours back.
Tooltip Use your own photo of the device (or drop a picture file on the picture)
Picks a photo of your own of this device (PNG, JPG, WebP, BMP): JoyPro copies it into its own folder and shows it. Place
its markers with the marker assistant. Dropping a picture file on the picture does the same.
Tooltip Removes your marker positions on this picture: JoyPro's own positions come back (a photo JoyPro has no positions for is then without markers)
Removes your marker positions on the shown picture: JoyPro's own positions show again where it has them, otherwise the
markers go until placed again. Ctrl+Z brings yours back until you save.
Tooltip Download the maker's product photo of this device from its web site and show it (stored on this PC only, never shipped). Off: JoyPro's drawing. Settings > Privacy: ask, always or never for all devices.
Your answer for this model's maker photo: ticked, JoyPro downloads the maker's product photo from the maker's site
(kept on this PC only) and shows it; unticked, JoyPro's drawing shows. Settings > Privacy sets ask, always or never for
all devices.
Tooltip Keep this device (names, new inputs, markers on the drawing) as your device definition
Keeps the shown device as your own device definition: the names you gave the parts, inputs you added and the markers on
JoyPro's drawing. JoyPro uses it for this device from then on.
Tooltip Save this device as a definition file (JSON) to share
Saves the shown device as a definition file (JSON) to share or to send to JoyPro: its parts with your names, new inputs
and the marker positions on the drawing.
Adds the devices of a definition file (JSON) to your device definitions and shows the first one. A file that is not a
definition is refused with a message.
Tooltip Save the marker positions of the shown picture to share (the maker's photo goes by its address only; your own photo goes inside)
Saves the marker positions of the shown picture as a file to share, with its tables and lines and the page with several
views. The maker's photo goes by its address only; your own photo goes inside the file.
Adds a legend table to the layout file with the name, kind (panel: an empty box behind labels; list: filled with the
binds), size and background colour above. It shows on the picture with Tables and lines on, where you can drag it.
Leaves out devices without a picture, also ticked ones, and makes the sheets of the others (--skip-missing-layouts).
Off, a ticked device without a picture stops the export with a note. The options of this section and the output
folder are kept for the next start.
Puts the pages on the DCS kneeboard: the Kneeboard folder of your DCS Saved Games folder (the one on the Export page)
and of a DCS.openbeta folder next to it, in the folder DCS uses for each aircraft (for example F-16C_50, A-10C_2,
F-15ESE).
Writes the pages into a folder you pick instead, one sub folder per game and aircraft, in the sheet's own shape. Point
an OpenKneeboard Folder tab at it, or any other kneeboard tool or game that shows a folder of pictures.
From the code false: the DCS kneeboard; true: KneeboardFolder.
On: every aircraft your devices have binds in gets its pages. Off: only the aircraft ticked above for the cheat sheets.
A game-mode copy such as F-16C_50_easy shares the kneeboard of its aircraft and is left out while that aircraft has
binds.
From the code true: every aircraft the devices have binds in; false: the aircraft ticked for the cheat sheets.
The pages of an aircraft list all devices, each device a section, instead of pages per device. The name ending and the page height (in pixels; 2048 makes
1536x2048 pages for DCS) are kept with the other options.
From the code One page per aircraft with all devices under each other, else one page per device.
Tooltip Off: the cheat sheet picture, as on the Layout page.
On (default): each page lists only the controls that do something in this aircraft, in large text, grouped by control
(for example "PC hat: Up - Target Management Switch - Up"), with a coloured tag on binds that need a modifier. A device
with many binds goes on to a second page (..._p2). Off: the cheat sheet picture instead, as on this page.
From the code The page: a list of the bound controls in large text (default), else the cheat sheet picture.
Put on the kneeboard puts the cheat sheet of each aircraft on its kneeboard: one page per aircraft and device (or one
page with all devices), drawn like the cheat sheets with the ticked devices and the sheet style. In DCS you find the
pages on the kneeboard of that aircraft in the cockpit (and in OpenKneeboard's DCS Aircraft tab). JoyPro only adds or
replaces its own pages, named JoyPro_...; your other kneeboard pages stay as they are. Press it again after you
changed binds: the pages are replaced. The preview shows the new pages. Engine: engine layout kneeboard.
Tooltip Makes the pictures (PNG) into the output folder. Games are not touched.
Makes the cheat sheets (PNG) into the output folder with the ticked devices, games, aircraft and the sheet style, and
shows them in the preview. Unsaved layout-file edits are saved first; a ticked device without a picture stops it with a
message. Games are not touched. Engine: engine layout render.