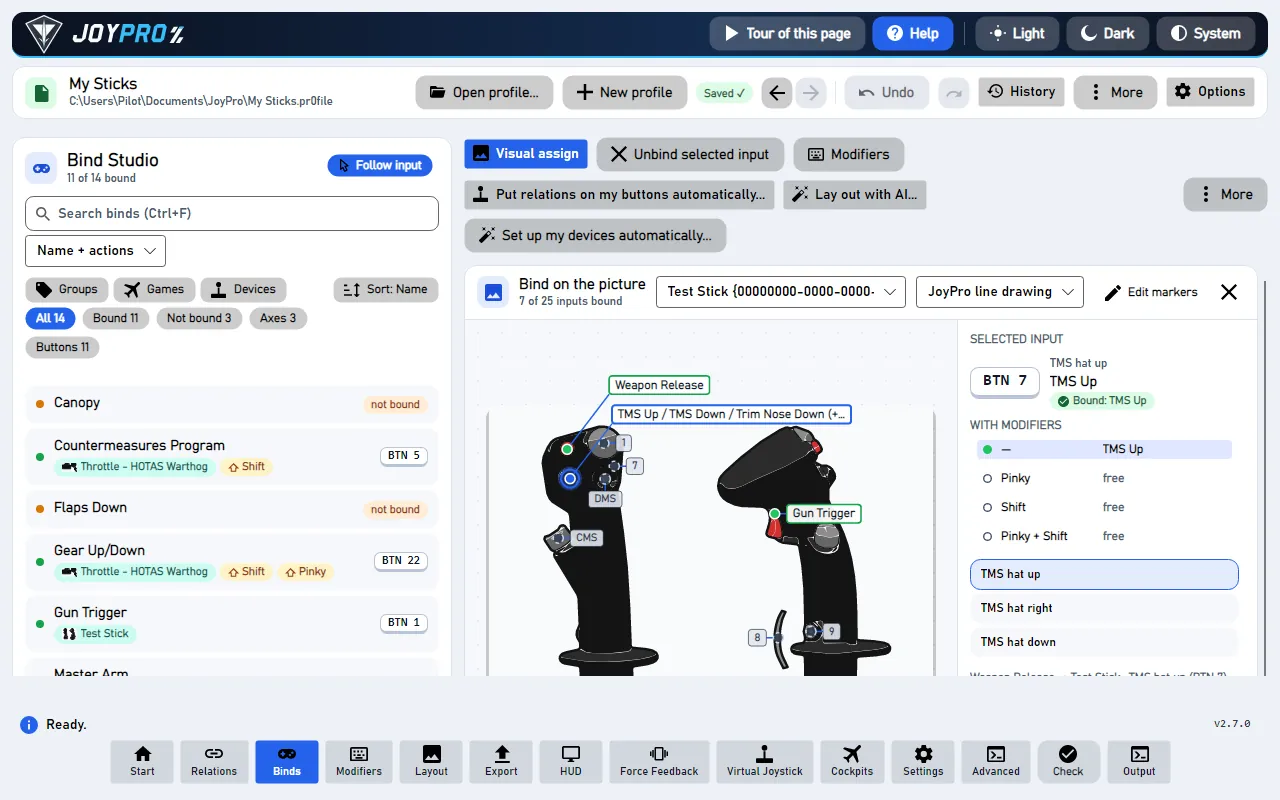
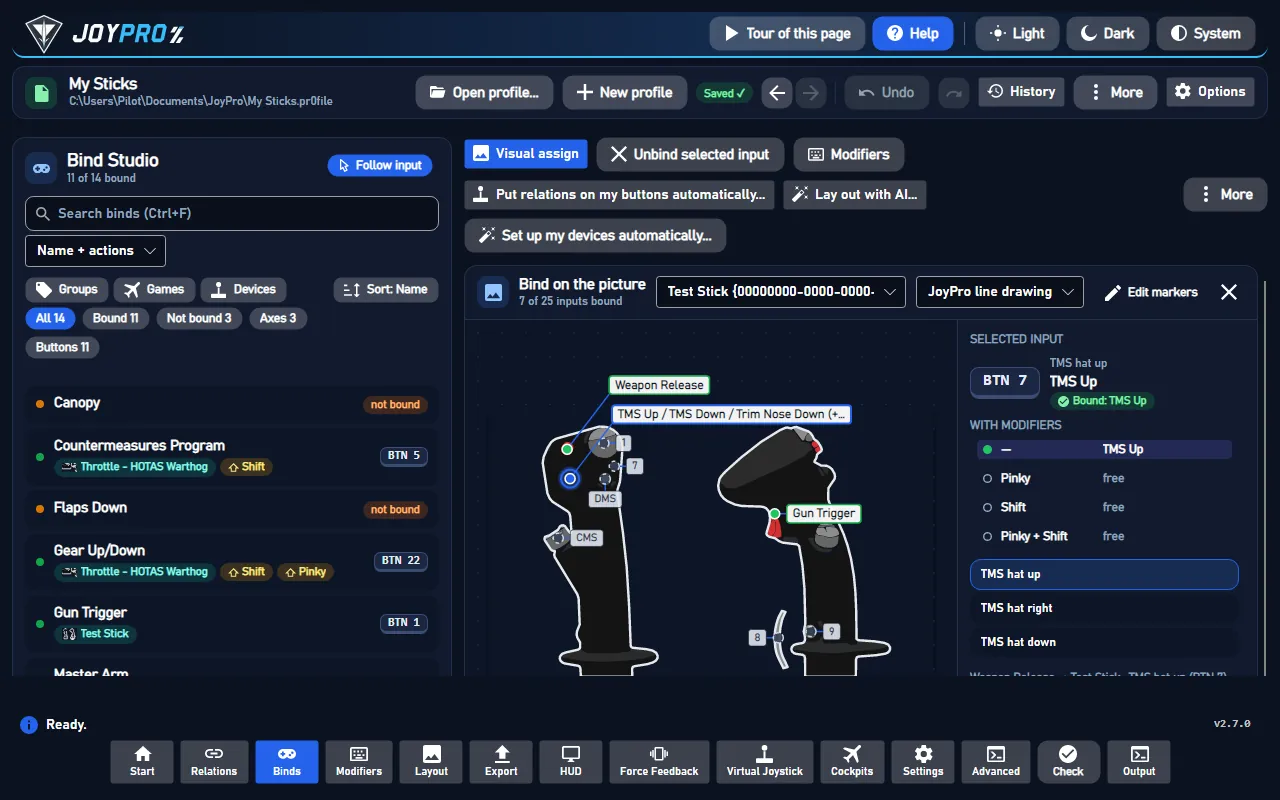
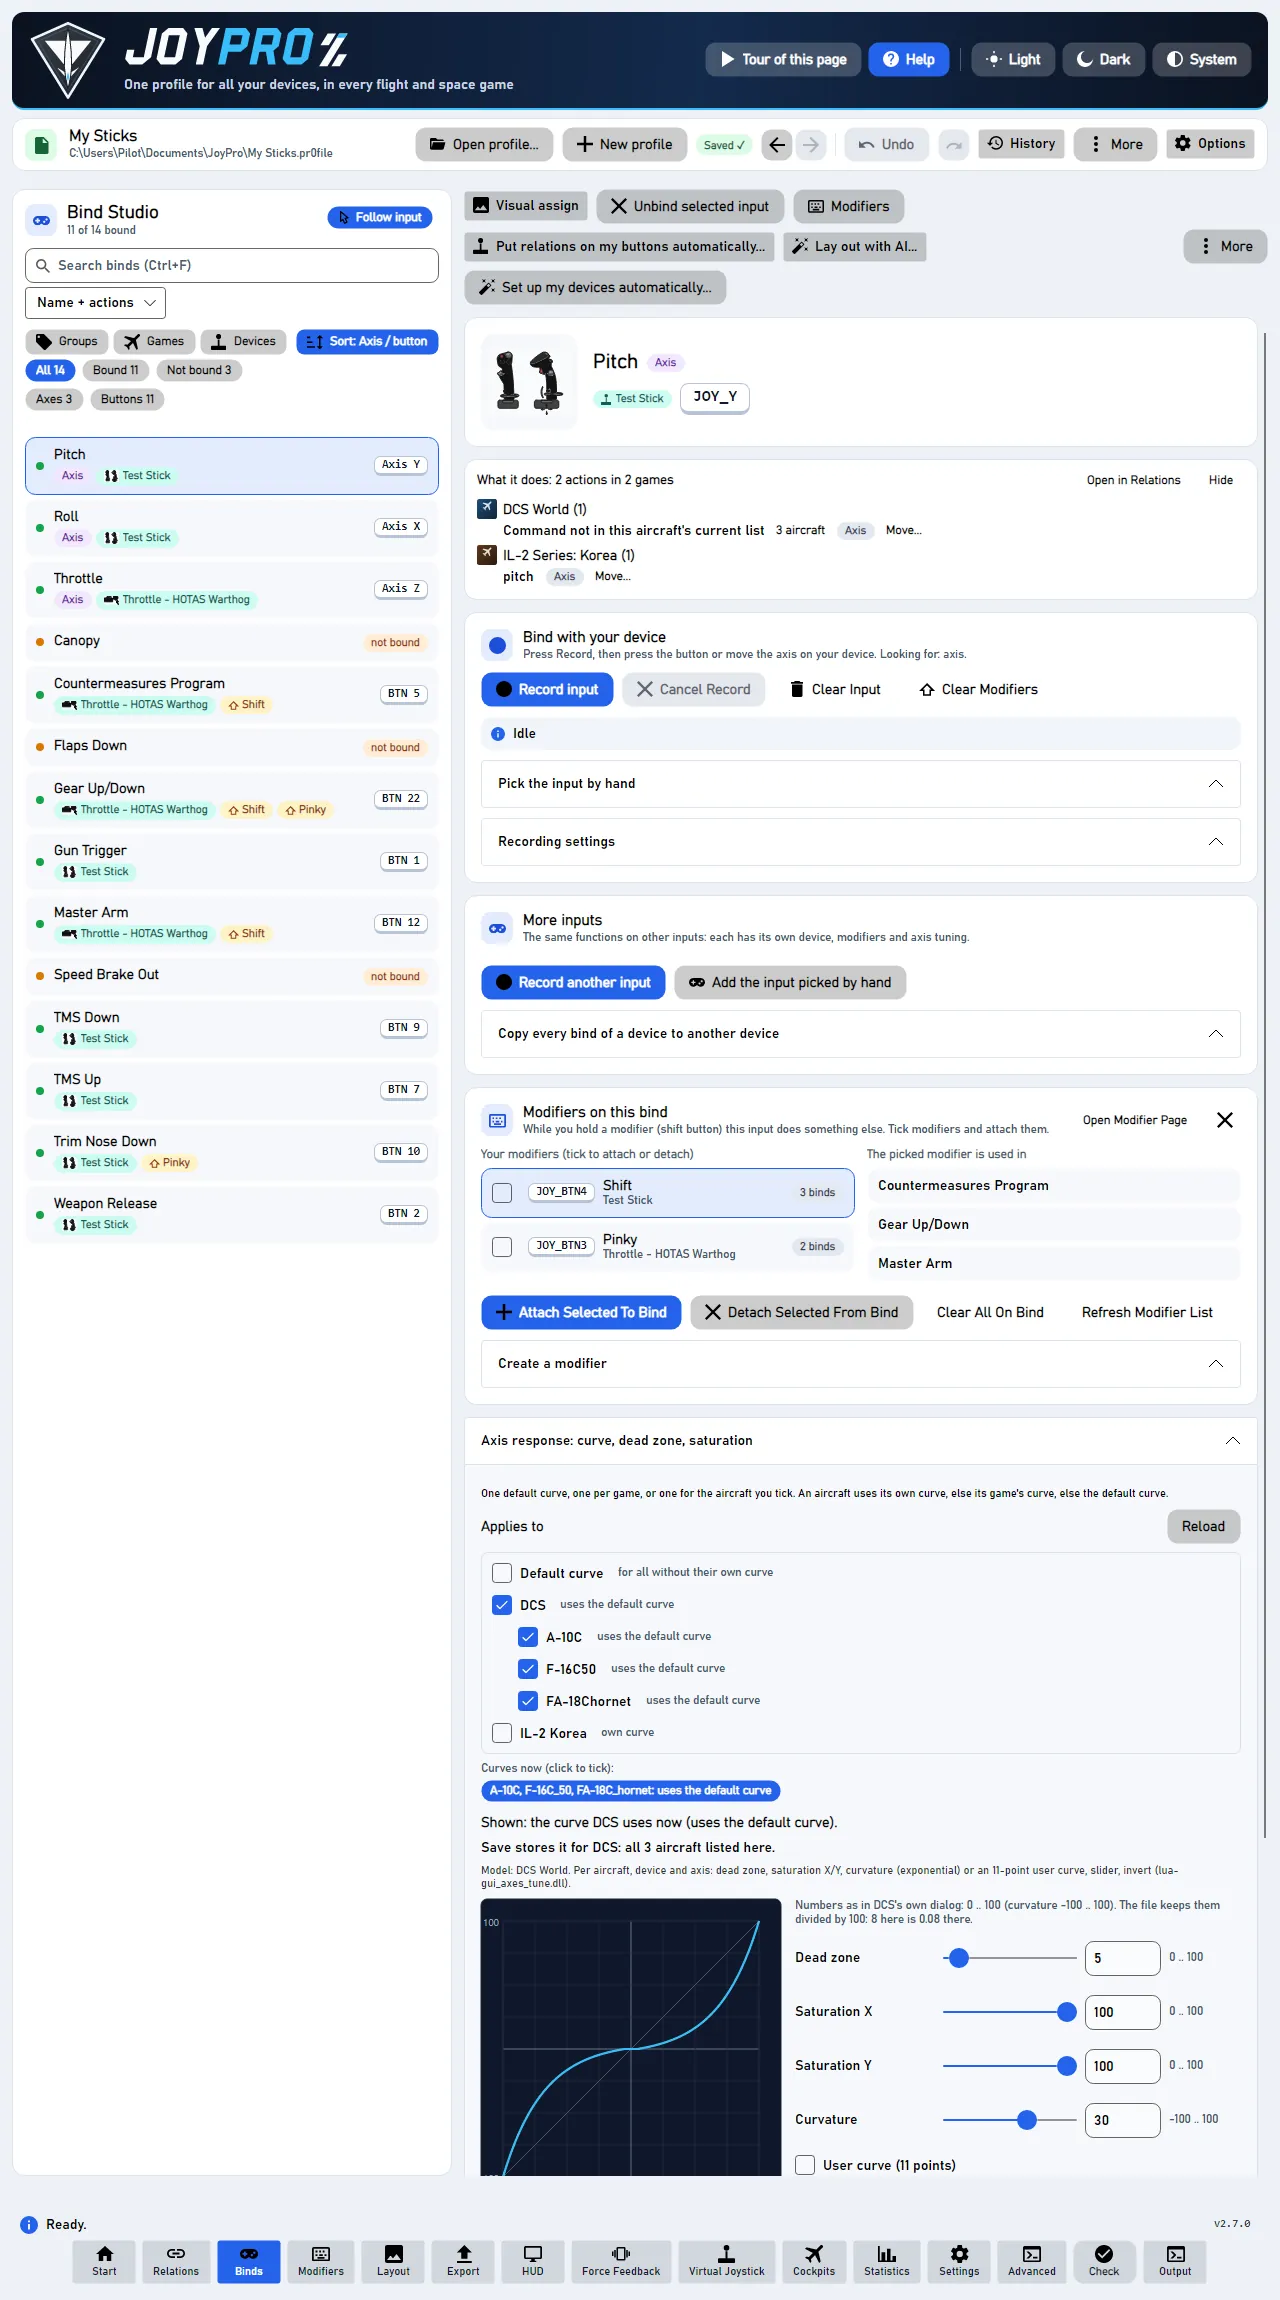
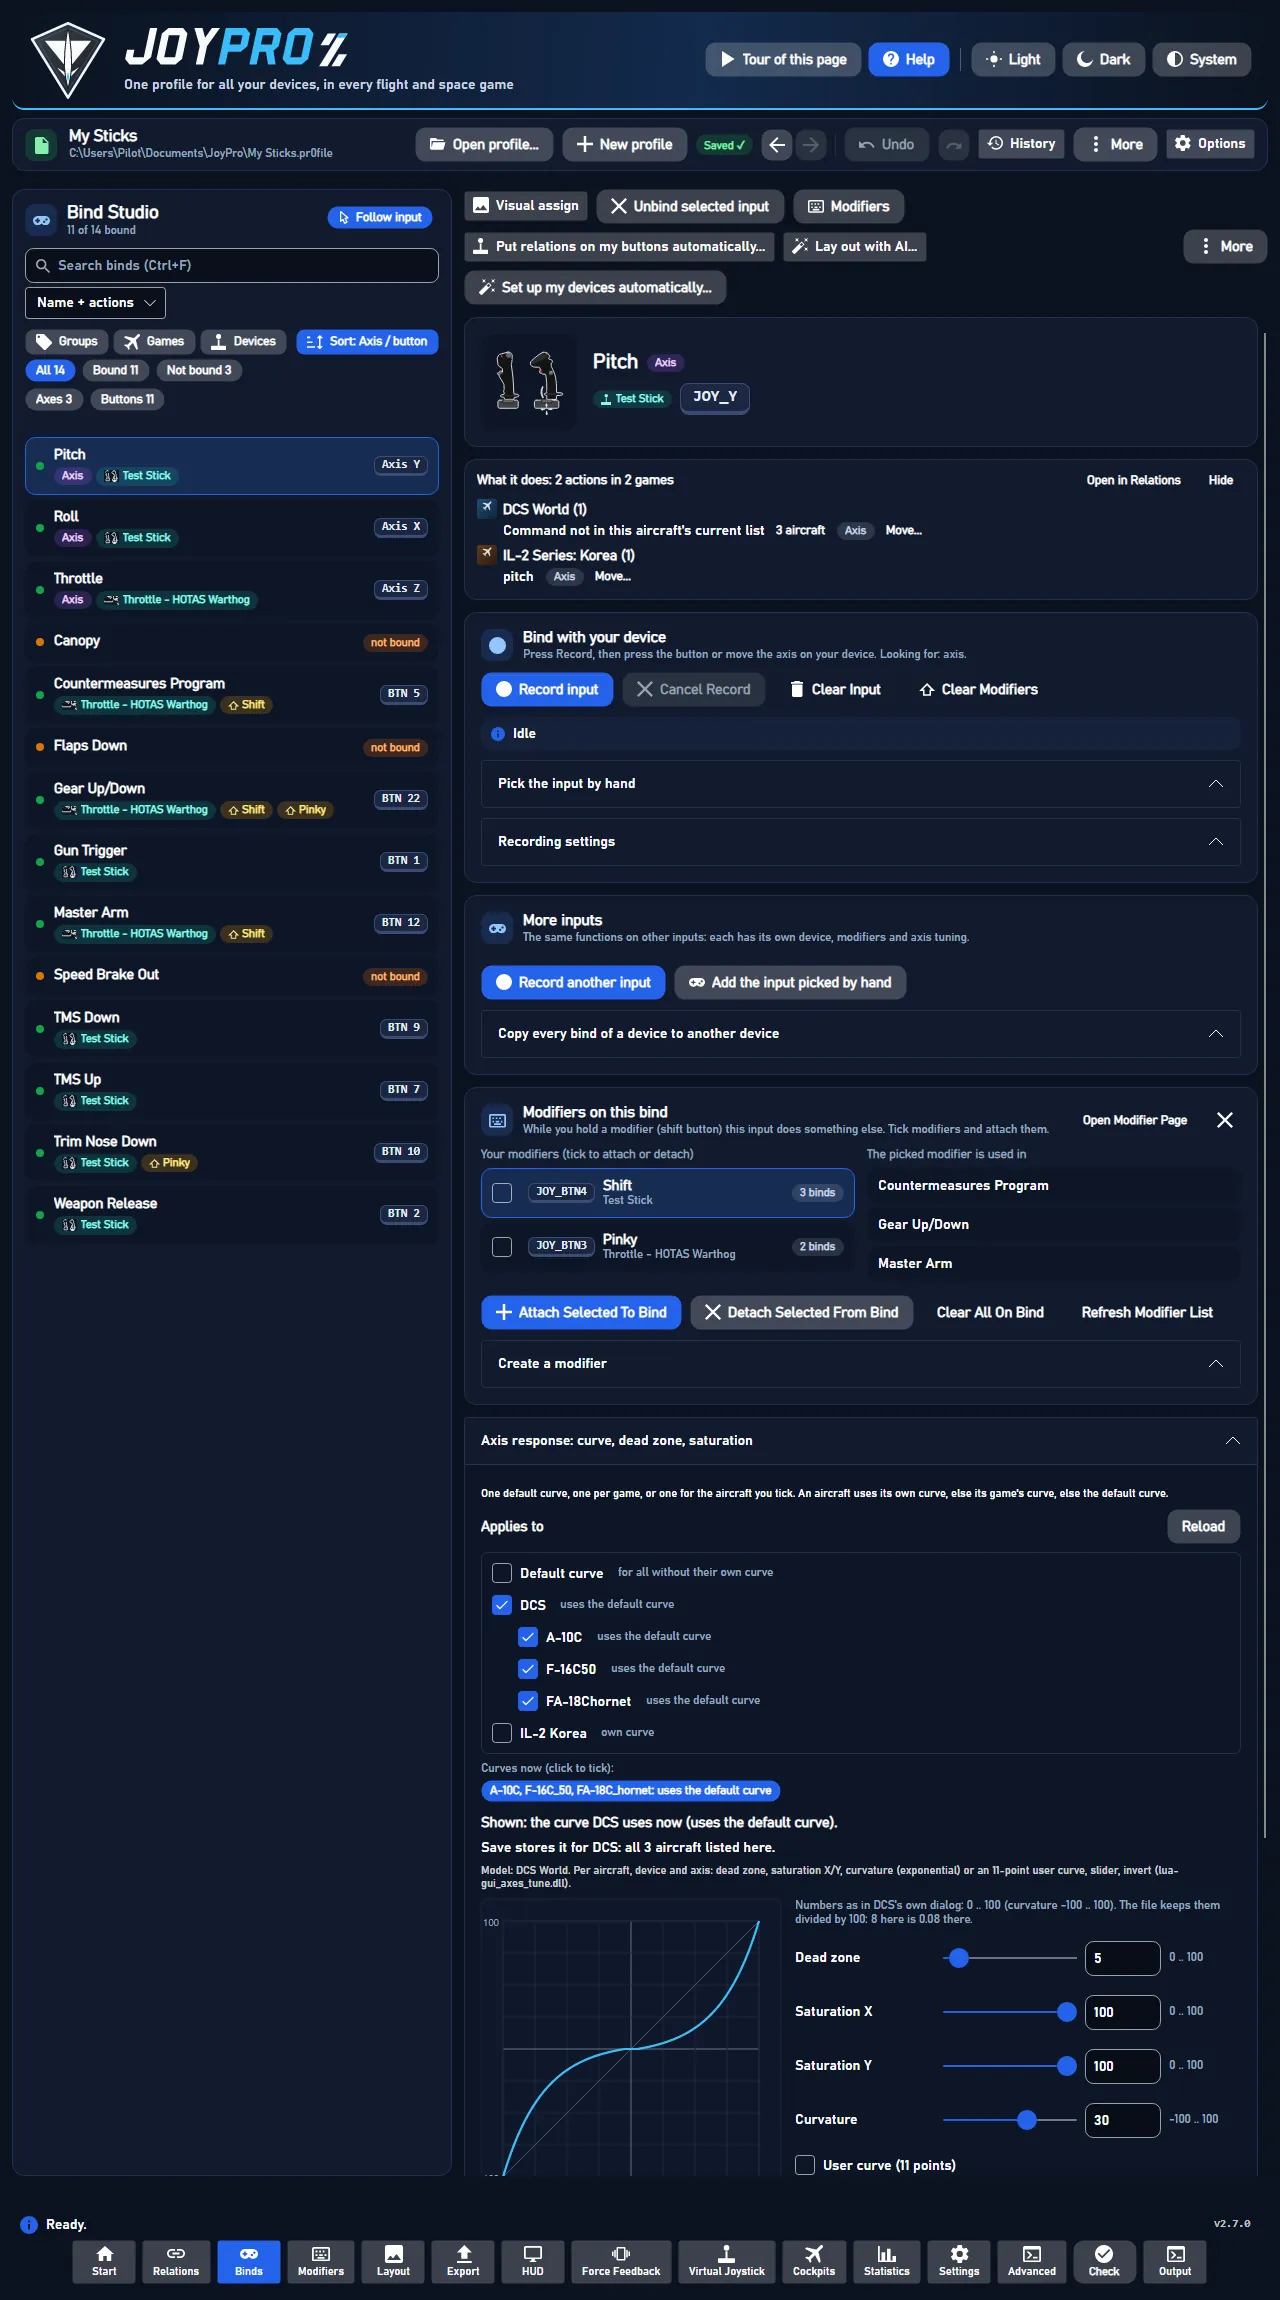
The Binds page puts each relation on a physical input: a button, a hat direction or an axis of one of your devices.
A relation says what happens ("Gear Up/Down" in every game and aircraft); its bind says where you press it
("Throttle - HOTAS Warthog, button 22"). Relations are made on the Relations page; the binds reach
the games when you export (Export to your games).
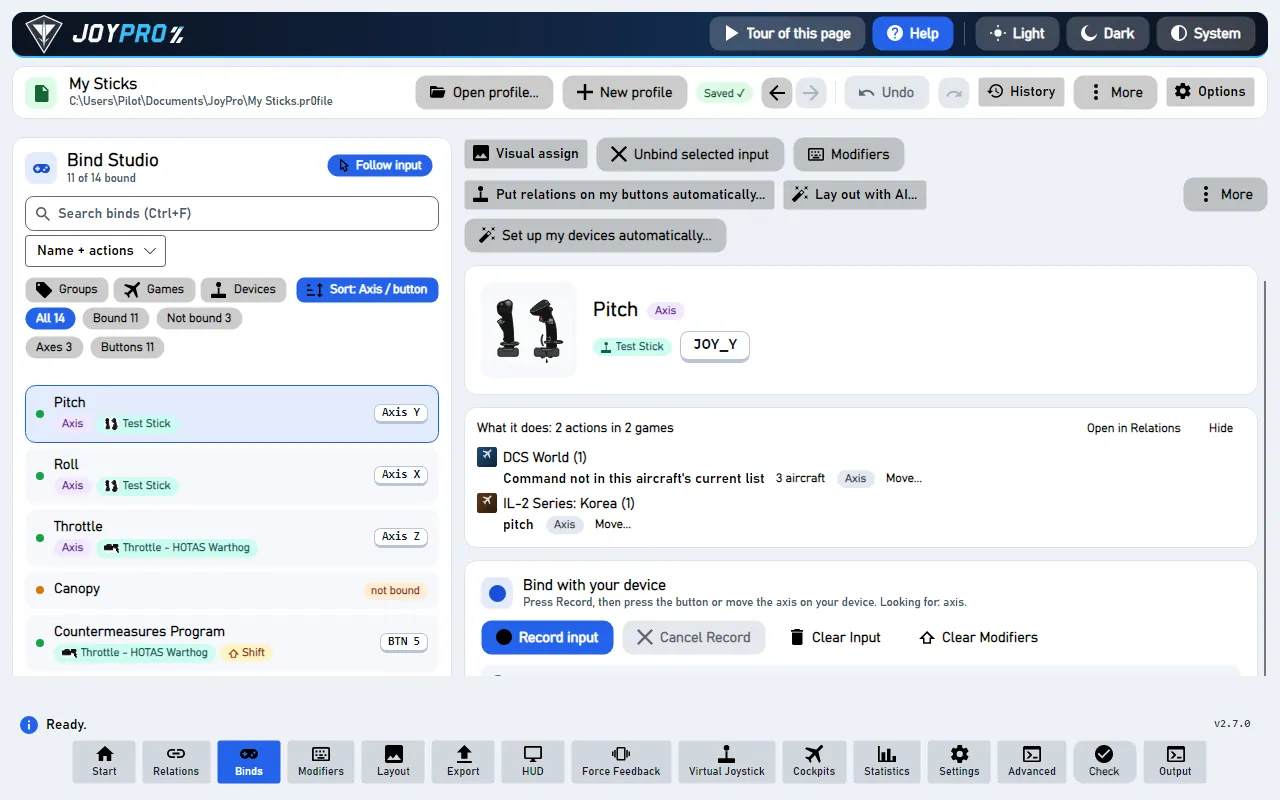
The Binds page with a selected axis relation
flowchart LR
  L["Pick a relation<br/>in the list"] --> R["Record input<br/>(or on the picture)"]
  R --> S["Saved at once:<br/>Input 1, with its own<br/>modifiers and curve"]
  S -.-> A["Record another input:<br/>Input 2, with its own<br/>modifiers and curve"]
Solid: every bind. Dotted: only when you want a second input, for example a second stick. Export then writes the binds into your games.
Pick a relation on the left. Each card shows the relation's name, its button ("Throttle - HOTAS Warthog ·
BTN 22") and a not bound chip when it has none yet.
Press Record input on the right, then press the button (or move the axis) on your stick. JoyPro waits up to
6 seconds, takes the first input that changes and binds it at once. The card on the left now shows the new input,
and the line under the buttons names the device as the list does (your name for it, if you gave it one).
Optional: a modifier (a shift button held at the same time, so one button does two jobs) and, for an axis, its
curve (dead zone, how soft or sharp the stick feels).
When everything is bound, go to Export and write it into your games.
The page knows whether a relation is an axis or a button: an axis relation only takes an axis you move a long way,
a button relation only a button, hat or switch. The line under the title says what it is waiting for
("Looking for: axis").
Follow input
Follow input (on by default) does the opposite: press any button on your devices and the list jumps to the
relation bound to it. Press the same button again for the next relation on it. Handy to answer "what is this button
doing?". It pauses while Record runs, while you type and while the device picture is open.
Follow input: a pressed button selects its relation
With no relations the page says Nothing to bind yet with Go to relations. Import a game on the
Start page or make relations first.
In the game: What a bind means in the game
After the export, the game's own controls menu shows the bound button on that action, in every aircraft the relation
covers. With a modifier, DCS shows it as a modifier combination (for example "JOY_BTN5 + JOY_BTN22"), IL-2 and Star
Citizen as their own modifier form. The axis curve becomes the game's own axis settings (DCS: Axis Tune; IL-2:
the response curve; Star Citizen: the axis's options), so you see the same curve in the game.
Visual assign: opens the device picture in place of the editor (see below).
Unbind selected input: takes the selected bind's input off every relation that uses it.
Modifiers: the modifier library (Modifiers page): rename, delete, see where they are used.
Put relations on my buttons automatically... (Auto Assign): JoyPro places your relations on fitting controls
(TMS on the TMS hat, gear on the gear lever, trim on the trim hat). Preview first, Apply changes, Ctrl+Z
undoes it. Options: Keep my layout, Re-assign bound relations, Only the selected relations, how many
modifiers at most, a mode switch for combat phases, devices that are not connected (Search Catalog, Add).
Reference: auto-assign.
Lay out with AI...: say in words how you like your controls ("throttle and left-hand stick, trim on the hat,
curves softer for helis"); JoyPro shows every change it would make, ticked, before Apply. Works without the
optional AI model for English phrases like the examples. Reference: layout-with-ai.
Set up my devices automatically...: the Setup wizard.
More: refresh, show the selected bind in the Output panel, replace a device, import and export binds as JSON,
save, merge another profile.
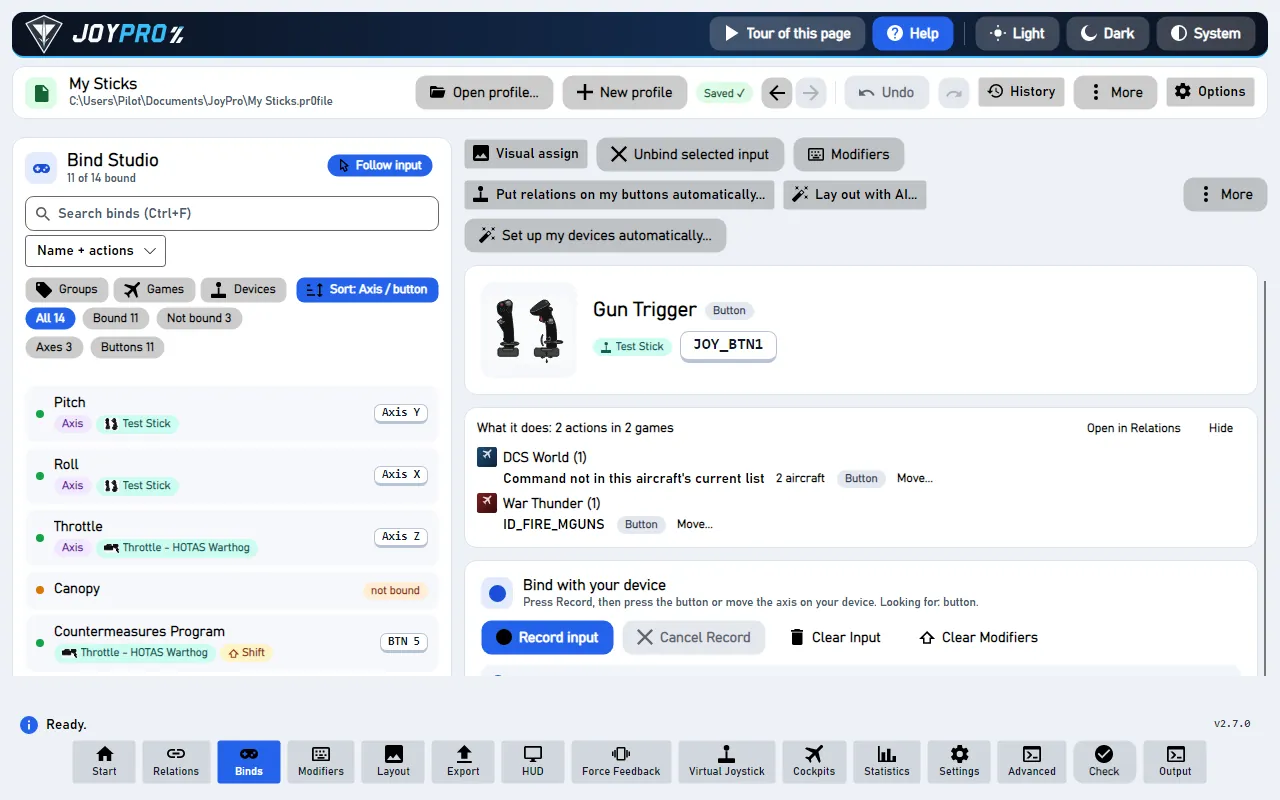
The selected bind (right side): the device picture (small), relation, device, input, axis or button, the
modifiers. What it does lists the relation's actions per game (read-only; Open in Relations changes them,
Move... sends one action to another button and leaves the rest here).
Bind with your device: Record input, Cancel Record, Clear Input (the relation keeps its modifiers and
curve, only the input goes), Clear Modifiers. Pick the input by hand: device and input lists, Set Bind,
Refresh Options, Clear Bind. Recording settings: timeout (ms), warm-up (ms), axis threshold (% of travel)
and "Also take a button that rests pressed when it is released" (for the middle position of a 3-way switch).
Modifiers on this bind: tick modifiers and Attach Selected To Bind / Detach Selected From Bind, or create
one (Create a modifier: name, device and input or Record Modifier Input, Invert for a switch that is
"on" when released). Its x closes it down to the title line (remembered); Show opens it again.
Axis response: curve, dead zone, saturation (axis relations only; it opens by itself when you pick an axis, and
stays closed for the next axis once you close it), see below. Detent mode (throttles with an
afterburner detent), see below. Bind behavior (advanced): inverted, slider, double tap. Unbind an input
everywhere (advanced): free one physical input in the whole profile.
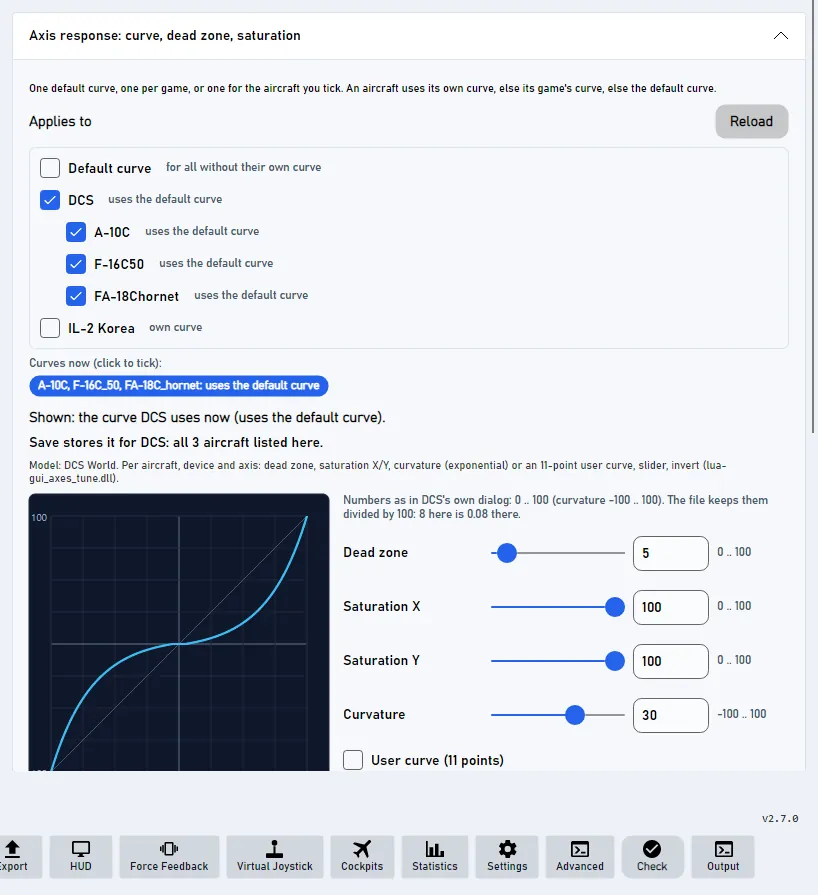
The axis response panel: Applies to, curve, parameters
One default curve, one per game, or one for the aircraft you tick. An aircraft uses its own curve, else its game's
curve, else the default curve. Applies to lists them with checkboxes:
Row
Example
Used for
Default curve
every game and aircraft without its own curve (up to 2.6.5 this row was called "All games")
A game
DCS, IL-2 Korea
every aircraft of that game in this relation without its own curve
An aircraft (DCS)
AH-64D BLK.II CPG
that aircraft only
A game family
MSFS family (MSFS 2024, MSFS 2020)
both games together; shown only when the relation has two of them (or a curve for the family is stored)
Next to each row stands what it uses today: own curve, same as ... (aircraft whose own curves are identical),
uses DCS / uses the default curve (no curve of its own; a change there changes it too). Its tooltip says the
same in a sentence. Only DCS has a row per aircraft: it is the only game whose curves are written per aircraft. The DCS
row means this relation's DCS aircraft listed under it, not all of DCS; with a curve of its own it says own curve, for
the aircraft below without one.
Games on the virtual Xbox pad (ACE COMBAT 8, Hell Let Loose: Vietnam, any game set to Xbox pad on the
Virtual Joystick page) get no export, so JoyPro applies their curve itself on the pad; the panel says so
in bold. Their invert never comes from DCS: it is the game's own (tick only that game and save), else the game's pad
convention (ACE COMBAT 8's pitch is reversed by default).
What is ticked when you open a relation: the aircraft that use DCS's curve (for a fresh relation: all of them).
Aircraft with their own curve stay unticked, so a save does not overwrite them by accident. The rows you last saved
for this relation come back instead, also after a restart, with their curve shown.
What Save does is written above the buttons:
all the aircraft that use DCS's curve ticked (the default): "Save stores it for DCS: all 5 aircraft listed here." The
curve is stored once for DCS, not once per aircraft, so these aircraft keep following DCS's curve later;
some of them: "Save stores it for these aircraft (3 of 5): ...". Each ticked aircraft gets this curve as its own,
in one step;
an aircraft that has its own curve ticked as well: a line in orange says "This replaces the own curve of ...". With
DCS's curve it then follows DCS again; ticked among a few aircraft it gets the curve shown;
the default curve, a game without aircraft rows, a family: that one row.
Several aircraft can be ticked together; any other row is ticked alone. Ticking aircraft one by one never ticks DCS by
itself while one of them is left out: one aircraft ticked gets its own curve, even when it is the only one that used
DCS's curve. Only when you tick all of them does the DCS row tick too. When the ticked aircraft have different
curves today, the line above says so and shows the first ticked one's curve; nothing is merged. Curves now (click to
tick) groups the aircraft by the curve they share ("AH-64D BLK.II CPG, AH-64D BLK.II Pilot, Ka-50 III: same curve",
"SA342 Copilot, SA342 Pilot: uses DCS"); a click ticks that group.
The panel shows the curve in blue and the default curve as a dashed orange line while the curve shown is not its
own. Each game has its own kind of curve (DCS: dead zone, saturation X/Y, curvature or an 11-point user curve; IL-2:
its own sensitivity and dead zones; X-Plane: free curve points), so the sliders on the right change with the row. When
a game falls back to the default curve, JoyPro fits that game's parameters to it as closely as the game can
express it.
Drag the white points to shape the curve, or use the sliders. Every setting also has a number box with its range
next to it: type the exact value, or press Up / Down (Shift: ten steps) or turn the mouse wheel over the box you are
in. A number outside the range goes back to its nearest end when you press Enter or leave the box, and the line under
the box says so. The user curve has 11 number boxes, one per 10 % of stick travel (0 % ... 100 %), in step with
the white points on the curve.
The numbers are in each game's own units; the line above the boxes says which. For DCS (and the base) they are the
ones of DCS's own axis tune dialog: dead zone, saturation X/Y and the user curve points 0 .. 100, curvature
-100 .. 100, so you type 8 for a dead zone of 8. Your profile and the export keep what DCS's files keep (0.08), and
a value with more decimals stays exact until you change it. Falcon BMS has the launcher's steps 0 .. 3, FSX 0 .. 127,
and so on.
Edits preview at once (also with the live position of your stick as a dot); Save stores them for the ticked rows,
in one step (one Ctrl+Z). Use the game's curve again removes the own curve of the ticked aircraft (for a game:
Use the default curve again), also in one step. Reload reads them again.
In detent mode the curve of an aircraft that detent mode bends ("uses the default curve, bent at the detent") is
shown as the game gets it, and it cannot be changed or saved here: a curve saved for it would win over detent mode and
switch it off for that aircraft. To change it, tick Default curve (the curve detent mode bends) or change the detent
settings below.
Copy to another axis... puts the same settings on another bound axis in one step, e.g. Thrust Left to Thrust
Right: pick the axis, tick Copy invert too only if both should invert alike, then Copy. It goes to the same
games or aircraft of the other axis (the ticked ones); one Ctrl+Z takes it back.
A throttle with an afterburner detent used to need one throttle relation per afterburner position. In detent mode
one throttle relation serves every aircraft: JoyPro bends the curve per aircraft so your throttle's detent is
exactly where that aircraft's afterburner starts (F-16C at 77 %, F-14 at 70 %, ...). Resting in the detent stays just
below the afterburner; pushing over it lights it.
The calibration belongs to the device axis. Every throttle relation on that axis shares it; a left and a right
lever are separate axes, each with its own. The line under the buttons says whether this axis is calibrated, and its
values.
Without a calibration detent mode changes nothing on that axis: every aircraft keeps the relation's curve. The
calibration is part of the profile, so Undo or a restored version can bring back the state before you made it.
Why "full power at the detent" is on by default: an aircraft without afterburner has nothing behind the detent, so
it reaches full power there; otherwise you would have to push through the detent for the last part. Untick it and its
curve runs over the whole travel.
Calibrate detent...: move the throttle to idle, then to the detent, then fully forward, then (optional) behind
the idle detent (cut-off). Confirm each position; JoyPro reads the axis live. Save calibration.
Tick Detent mode on.
Already have one throttle relation per aircraft? Merge my throttle relations... shows a plan per device axis
with every throttle relation of that axis ticked. Untick the ones to keep apart (a helicopter collective, a
propeller aircraft): they stay as they are, with their own curve and their own detent settings, and the plan is
made again for the ticked ones. Merge joins the ticked ones into one relation in detent mode; Undo merge
takes it back.
The aircraft groups below show where each group's afterburner starts and where that number comes from; type your
own value and Set, or Game data to go back.
In the game: Detent mode in the game
In every exported aircraft the throttle reaches the afterburner exactly at your device's detent. DCS gets a per
aircraft curve (dead zone and saturation, or the user curve), X-Plane curve points; games with one curve for every
aircraft get what most of the relation's aircraft need, and the export lists the rest.
Ctrl+Z undoes every bind change, also after a restart (History).
A bind on a device that is not connected stays; the card shows it greyed and the export still writes it.
Replace the selected bind's device... (More) moves every bind of that device to another one, input by input,
with a preview: for a new stick of the same kind or one that got a new id.
The same button on two relations is allowed; the Check tells you where that means two jobs in one
aircraft.
A relation can be on more than one input, each with its own device, modifiers and axis curve (the same grip on two
bases, a second fire button). The card shows +1 (the other inputs in its tooltip), and the selected relation has the
panel More inputs:
Record another input / Add the input picked by hand: one more input of this relation.
Make main: that input becomes the main input (games that keep one input per action get the main input).
Remove: takes the input off.
Copy every bind of a device to another device: pick the First device and the Second device, Preview
shows which input goes where (matched like Replace device), Copy adds them in one step (Ctrl+Z undoes it). The
first device keeps its binds.
Exports write every input where the game can hold several per action and name the relations where it cannot
(Export). Details and the table per game: docs/multi-bind.md. A relation with one input is
exactly as before; there is no setting to switch on (until 2.6.5 it was Settings > Experimental).
Every page finds a relation by any of its inputs: Follow input and the HUD on a press of the second stick, the
Layout page's picture and tables, the Devices filter of this page and of the Relations page, the search with the scope
Everything ("MOZA" finds the relations with an input on it), the Check page and Replace/Remove device. For an axis with several inputs the
section Axis response has an Input list at the top: each input has its own curve, dead zone and saturation; pick
the one to tune (the main input is input 1).
View model: MainWindowViewModel.cs (bind list, record, set/clear, modifiers), MainWindowViewModel.AxisTuning.cs
(curve, live preview with the linked engine/AxisTuning.cs), MainWindowViewModel.AxisTuningAppliesTo.cs (the
"Applies to" ticks, the save plan, groups, remembered ticks), MainWindowViewModel.Detent.cs,
MainWindowViewModel.AutoAssign.cs, MainWindowViewModel.LayoutWithAi.cs, MainWindowViewModel.LayoutWorkspace.cs
and MainWindowViewModel.VisualAssign.cs (bind on the picture), MainWindowViewModel.LiveInput.cs (follow input),
MainWindowViewModel.BindPeek.cs (What it does), MainWindowViewModel.MoveAction.cs.
Record input from the click to the saved bind:
#
Who
What happens
1
You
Press Record input.
2
Binds page
Starts the capture service (DirectInput, CaptureNextAsync): axis or button mode, time limit, warm-up, threshold.
3
You
Press a button or move an axis.
4
Capture service
Reports the device and the input (for example JOY_BTN22).
5
Engine
binds set "Gear Up/Down" --device ... --input JOY_BTN22 saves the bind (profile autosave, history version).
6
Binds page
binds list refreshes the cards.
Capture: Services/JoystickCaptureService.cs polls DirectInput; Services/RecordButtonTracker.cs takes only
transitions, never a button that was already pressed when recording started (unless "Also take a button that rests
pressed" is ticked). Analog keyboards' axes are ignored unless allowed in Settings > Devices. Details:
Live input.
109 controls, read from the program’s source: 109 written, 0 with the facts from the source (tooltip, code comment, engine call), 0 still to be expanded.
Tooltip Follow input: press a button or move an axis a long way and the list jumps to its relation; press it again for the next relation on it (without modifiers first). Not while recording or typing. The switch is kept for the next start (Settings > Binds has it too).
Follow input: press a button or move an axis a long way and the list jumps to its relation; press it again for the
next relation on it (without modifiers first). Not while recording or typing. On by default; the same setting as on
the Relations page and in Settings > Binds, kept across restarts.
From the code Settings > Binds and the toggles of the Binds and Relations pages: on by default.
Tooltip Only one action goes to another button; the other actions stay on this one
Right-click on a bind card: opens Move to another button with every action of the relation to pick from. Only the
picked action (with its aircraft) moves to the new input you press or pick; the other actions stay on this one. One
undo step. Engine: engine relations item move-to-input.
From the code The Binds page: the bind row's context menu (every action of the relation to pick from).
Shown when the profile has no relations yet: opens the Relations page, where you make relations
(or let JoyPro build them) before you can bind anything.
Tooltip Pick relations on the picture of your device
Visual assign: shows the picture of your device with a marker on every button and axis in place of the editor, to
pick relations on it; the x on the picture closes it again.
Tooltip Removes the selected bind's input from every relation that uses it
Takes the selected bind's input (device and input) off every relation that uses it, without a question first. The
relations and their actions stay; Ctrl+Z undoes it. Engine: engine binds unbind--all. In the game: after the next
export that button does none of these actions.
From the code Frees the physical input of the selected bind in every relation that uses it (engine binds unbind).
Tooltip Auto Assign: JoyPro binds your relations to fitting controls of your devices (TMS on the TMS hat, gear on the gear lever). Preview first; nothing changes until Apply.
Opens or closes Put relations on my buttons automatically (Auto Assign) on the Binds page; the first time it
detects your devices from the device catalog. Nothing changes before Apply. Engine: engine devices kbidentify.
Tooltip Say in your words how you like your controls (throttle and left-hand stick, trim on the hat, curves softer for helis); JoyPro lays out binds, curves, force feedback and vJoy and shows every change before anything is applied.
Opens or closes Lay out with AI on the Binds page and reads the preferences this profile keeps
(engine arrange prefs). Say how you like your controls; JoyPro shows every change to binds, curves, force feedback
and vJoy before anything is applied.
Tooltip Setup wizard: relations and binds for the games you watch in one go (device roles, aircraft priorities, modifiers, where functions go), then you review before anything changes
Opens the Setup wizard: relations and binds for the games you watch in one go (device roles,
aircraft priorities, modifiers, how real), reviewed before anything changes. A wizard you closed before Apply
comes back as you left it.
From the code A wizard the user closed before Apply comes back as it was (devices, priorities, plan); after Apply a new one starts.
Opens the More menu: refresh the binds, show the selected bind in the Output panel, replace the selected bind's
device, import or export binds as JSON, save and merge the profile.
Reads the profile's binds again (engine binds list, and the relations first when none are loaded) and rebuilds the
cards. Use it after you changed the profile outside this window (engine command, another JoyPro).
Prints everything about the selected bind into the Output panel: device, input, modifiers, axis settings and the
relation's actions (engine binds show; for a relation without a bind engine relations show). Changes nothing.
Tooltip Move every bind of that device to another device, input by input, with a preview
More menu: opens the Replace device window with the selected bind's device as the old device. Pick the new one;
every bind moves input by input, with a preview you can change per input. Move binds asks first and keeps a copy
of the profile next to it; the move is one undo step.
From the code The window, with the card's device as the old device (or empty to pick one).
Picks a binds JSON file (made by Export Binds JSON... or engine binds export) and asks first: the file's binds
replace all binds of the profile, and relations without a bind in the file lose theirs (engine binds import --replace). One undo step. In the game: the imported buttons are written at the next export.
Saves every bind of the profile (relation, device, input, modifiers, axis settings) as a JSON file
(engine binds export), for a backup, to share a layout or to edit with other tools. The profile does not change.
Saves the profile now (Ctrl+S). JoyPro saves by itself after every change; this writes pending edits at once and
writes the file again (engine profile save).
Adds the profile picked under Add another profile... in the profile bar to the open one: its relations, binds and
modifiers (engine profile merge). Asks first; with the same relation in both, the merge mode decides whose wins. A
copy of your profile is kept next to it before the merge.
#Also make relations for functions I do not have yet
Check boxwritten
Tooltip Like the Setup wizard: relations for the important functions of your games that your profile does not have, placed with the rest
Lay out with AI: also makes relations for the important functions of your games that the profile does not have yet,
placed with the rest, like the Setup wizard (--add-missing). Remembered.
From the code Also make relations for the functions of your games you do not have yet (like the Setup wizard).
Tooltip Shows what JoyPro understood and every change; nothing changes yet
Lay out with AI: Preview shows what JoyPro understood (your preferences, and what it did not understand) and every
change, grouped and ticked. Without the local AI it reads English phrases like the examples. Nothing changes yet.
Engine: engine arrange ask.
From the code The preview: what JoyPro understood and every change (nothing changes yet).
Tooltip Applies the ticked changes as one step (Undo takes all of them back)
Lay out with AI: applies the ticked changes in one engine call, so one Undo (Ctrl+Z) takes all of them back; your
preferences are kept in the profile. Engine: engine arrange apply. In the game: the new binds and curves are written
at the next export.
From the code Applies the ticked changes in one engine call = one history version (Undo takes all of it back).
Shown after Apply in Lay out with AI: takes the whole applied layout back in one step (the binds, curves and
settings are as before; the same as one Ctrl+Z).
Tooltip Forget every preference kept in this profile
Lay out with AI: Forget all removes every preference this profile keeps and discards the preview. Your binds stay
as they are. Engine: engine arrange prefsclear.
Lay out with AI: Forget removes this one preference (a kept one also from the profile) and discards the shown
preview; press Preview again for a new one. Engine: engine arrange prefsremove.
From the code Forgets a kept preference (engine arrange prefs remove) and discards a preview that is shown (Preview makes a new one without it).
#Tick for Delete or for attaching on the Binds page
Check boxwritten2 ×
The tick of one item in a list: in Lay out with AI one proposed change (only ticked changes are applied); in the
modifier list of Modifiers on this bind one modifier to attach, detach or delete.
Tooltip Recognises the connected devices from the device catalog
Auto Assign: recognises the connected devices from JoyPro's device catalog again and lists them (with the grips to
pick where several fit a base). Your picked grips and Leave out ticks stay. Engine: engine devices kbidentify.
Tooltip What JoyPro knows about each input of this device (device catalog)
Auto Assign: Layout shows what JoyPro knows about each input of this device from the catalog (its grip when one is
picked), with its picture. Changes nothing. Engine: engine devices kbshow.
From the code The layout of a detected device (its grip when one is picked) or of the catalog device picked in the search.
Searches JoyPro's device catalog (about 320 sim devices) for the text typed next to it, for example "Orion"
(engine devices kb list <text>). Pick a result to add it as a device that is not connected.
Adds the picked catalog device to Auto Assign as a device that is not connected yet: its binds go on a placeholder
device that you exchange for the real one once it is plugged in (--add-device).
Tooltip What JoyPro knows about each input of the picked catalog device
Auto Assign: Show Layout shows what JoyPro knows about each input of the catalog device picked in the search.
Changes nothing. Engine: engine devices kbshow.
Tooltip Relations go back on the control they had before (also after a device got a new id)
Auto Assign (on by default): relations go back on the control they had before, also after a device got a new id. Off:
JoyPro places them without your layout as a guide (--no-style). Remembered.
Tooltip Lays out the binds on these devices again; keyboard, vJoy and disconnected devices stay
Auto Assign: lays out the binds on these devices again, also of relations that are bound already (--overwrite).
Keyboard, vJoy and disconnected devices stay unless you tick Also move binds of devices that are not connected.
Remembered.
#Also move binds of devices that are not connected
Check boxwritten
With Re-assign bound relations: also moves the binds of devices that are not connected now onto the connected
devices. Off (default), binds on unplugged devices stay where they are (--include-missing).
Shows every assignment Auto Assign would make, in plain words ("Hat 1 down (TMS hat down)"), and what stays free and
why. Nothing changes (engine relations auto-assign --dry-run).
Tooltip Why the selected relations get their control: the best candidates with their score and what occupies them (a preview, nothing changes)
Auto Assign: Explain Selected shows why the selected relations get their control: their slot, their previous
control and the best candidates with their score and what occupies them. A preview: nothing changes. Engine:
engine relations auto-assign--explain --dry-run.
From the code Why the selected relations land where they do (--explain): their slot, previous control and the best candidates with their score and what occupies them. A preview: nothing changes.
Makes the assignments (engine relations auto-assign) as one undo step and reloads the relations and binds. In the
game: the placed relations are on those buttons after the next export.
Tooltip Open this picture on the Layout page: move the markers onto the real parts, your photo, the marker assistant
Visual assign: Edit markers opens this device on the Layout page in marker editing: move the markers onto the real
parts, use your own photo or the marker assistant.
From the code Bind Studio's picture -> the Layout page with the same device (marker editing, the assistant, cheat sheets).
Tooltip Turn the device around (drag; wheel zooms; double click resets); drop a relation on a part to bind it
Visual assign, for devices with a 3D view: shows the device in 3D. Drag to turn it, the wheel zooms, a double click
resets; drop a relation on a part to bind it.
Visual assign: picks this modifier combination (none, one modifier, several) for the selected input; Bind here
then binds with it. Each row shows what the input does under exactly those modifiers.
From the code A modifier combination clicked in the side panel: "Bind here" binds with it.
Tooltip Binds the relation picked on the left (or in the list) to this input
Visual assign: Bind here binds the relation picked in the side list (or on the left) to the selected input, with
the picked modifier combination. A relation that had this input loses it first. Axes go only on axes, buttons on
buttons. Engine: engine binds clear--input-only, engine binds set. In the game: after the next export that input
does the relation's actions.
From the code Binds a relation to the selected input ("Bind here"): the parameter, else the one picked in the side panel's list, else the relation picked on the left (Bind Studio). With the picked modifier combination on a reference picture.
Bind on the picture: frees the selected input under the picked modifier combination, so no relation is bound there
any more (engine binds clear). The marker turns grey ("free"). In the game: that button does nothing there after the
next export (with Replace on my devices).
Tooltip Only one action goes to another button; the other actions stay on this one
What it does: Move... sends only this action (with its aircraft) to another input you press or pick; the
relation's other actions stay here. One undo step. Engine: engine relations item move-to-input. In the game: after
the next export that action is on the new input.
From the code The Binds page: an action of the "What it does" peek.
Shows once a game control is picked in the list: it waits for the next input on any device (6 s by default) and binds it to the selected relation at once
(engine binds set). Press one button; for a stick axis, move it all the way. An axis relation takes only an axis
moved past the threshold (30 %), a button relation only a button or hat that changes state. If you selected another relation while it waited, the input is kept in the fields
and Set Bind applies it. In the game: after the export that button does the relation's actions.
Clear Input takes the input off the selected relation; the relation keeps its modifiers and axis curve. Ctrl+Z
undoes it. Engine: engine binds clear--input-only. In the game: after the next export the relation is on no
button.
Removes every modifier from the selected bind (engine binds modifier remove --all); the input stays. In the game:
the button then works without holding a shift button.
Reads the connected devices and their inputs again (engine devices list, engine devices inputs) and refills the
device and input lists, for example after you plugged in a stick.
Removes the selected relation's bind (engine binds clear): input, modifiers and axis settings on it. The relation
and its actions stay. In the game: after the export the relation is on no button.
#Also take a button that rests pressed when it is released
Check boxwritten
Tooltip Record only takes a button that changes state. A button that was already pressed when recording started (the middle of a 3-way switch, a mode switch) never counts; with this ticked, letting it go counts as that button.
Recording settings: Record only takes a button that changes state, so a button already pressed when recording starts
(the middle of a 3-way switch, a mode switch) never counts. Ticked, letting it go counts as that button. Kept across
restarts.
From the code Record: releasing a button that rests pressed counts (off: such buttons never count).
Tooltip This input becomes the main input; the main input takes its place. Games that keep one input per action get the main input.
Make main (More inputs): this input becomes the relation's main input and the old main input becomes
an extra one. Games that keep only one input per action get the main input, so this decides which one they use. One
Ctrl+Z takes it back.
Remove (More inputs): takes this extra input off the relation, with its modifiers and its axis curve.
The main input and the relation's actions stay. One Ctrl+Z puts it back.
Record another input (More inputs): press or move the input on any device; it becomes one more input
of the selected relation, next to the main one. If that input already carries another relation, the Check page lists it
as an input that does two things.
From the code Record another input: the next button or axis becomes one more input of the selected relation.
Tooltip The device and input of Pick the input by hand above become one more input of this relation
Add the input picked by hand (More inputs): adds the device and input chosen in the pickers above as
one more input of the selected relation, for an input that is hard to record (a detent, a very light axis).
From the code The device and input picked by hand (the picker above) as another input.
Refresh Options (Copy every bind of a device to another device): builds the two device lists again from the devices
of the profile's binds and the devices in the input picker, e.g. after a new bind.
Preview (Copy every bind of a device to another device): lists every bind of the first device and the input of the
second device it would get, matched like Replace device (the same input ids for the same product, else by the part on
the device). Nothing changes yet; inputs that have no match are named.
From the code Preview: what would be copied (engine devices copy-to --dry-run); nothing changes.
Copy (Copy every bind of a device to another device): adds the matched inputs of the second device as extra inputs
of the same relations, in one step that one Ctrl+Z takes back. The first device keeps all its binds.
From the code Copy: one engine call, one profile version (Ctrl+Z undoes it).
#Close the modifiers of this bind (Show opens them again)
Buttonwritten
The x of Modifiers on this bind: closes the panel down to its title line, so the axis response and the rest
of the page move up. JoyPro remembers it (also after a restart); Show opens it again.
Attaches the ticked modifiers to the selected bind (engine binds modifier add). In the game: the button only does
the relation while those modifiers are held (or switched on).
Creates the modifier (name, device, input, invert) and attaches it to the relation chosen under "On relation" (or
keeps it as a temporary modifier until it is attached). Warns and stops when that input is already another
modifier. Engine: engine binds modifier add.
Deletes the ticked modifiers from every bind of the profile (engine binds modifier remove per relation). In the
game: those binds work without the shift button after the next export; binds that only differed by the modifier now
share one button (the Check shows it).
Reads the selected axis relation's curves again from the profile (engine binds tuning show: what each game and
aircraft uses, the curve shown) and drops unsaved edits of the panel.
Axis response, Applies to: ticks where the curve shown is saved. Several aircraft of a game can be ticked together;
the game's row ticks the aircraft that use its curve (aircraft with an own curve stay unticked); ticking aircraft one by
one ticks the game's row only when all its aircraft are ticked; any other row is ticked alone. In the detent merge
helper the same checkboxes pick the relations to merge. The text next to it says what the row uses today; nothing is stored until Save.
Axis response, Curves now: ticks the aircraft that share this curve (or the ones that use the game's curve) and
shows their curve. Nothing is stored until Save.
A switch among a curve's parameters: Invert (the axis works the other way round) or Slider / "One-sided axis"
(throttle, brakes: no centre). Saved with Save as --inverted / --slider. In the game: the
axis's invert and slider settings of that game.
#Curve points (free stops, replace dead zone, saturation and curvature)
Check boxwritten
Tooltip The game's response curve with any number of stops: x = axis travel, y = output, both 0..1, x increasing
Axis response, for games with free curve points (X-Plane): replaces dead zone, saturation and curvature with a curve
of any number of stops: x = axis travel, y = output, both 0..1, x increasing. Stored with Save
(--curve-points).
#Saves the curve shown for every ticked row, in one step: Ctrl+Z undoes it.
Buttonwritten
Stores the curve shown for the ticked rows, in one engine run (one Ctrl+Z): the line above the button says what it does.
Not while detent mode makes the curve of the ticked aircraft (the button is off then).
All the aircraft that use DCS's curve ticked: DCS's curve (engine binds tuning set --scope game:DCS, ticked aircraft
with an own curve lose it in the same run with --clear-scope); some of them: a curve per aircraft (--scope once
each). For the default curve it also updates the bind's own axis values. The ticks are remembered for the relation. In the game:
the next export writes this curve into the game's axis settings for those aircraft, that game or family.
#Removes the own curve of the ticked rows, in one step (Ctrl+Z undoes it): an aircraft then uses its game's curve, a game the default curve.
Buttonwritten
Use the game's curve again (for a game: Use the default curve again) removes the own curve of the ticked
rows without a question, all in one step: an aircraft then uses its game's curve, a game its family's or the default
curve. Not for the default curve itself. Ctrl+Z undoes it. Engine: engine binds tuning clear with --scope per row. In the game:
the next export writes the curve they use then.
Tooltip The same dead zone, saturation, curve and slider on another bound axis (e.g. Thrust Left to Thrust Right), in one step
Copy to another axis... in the axis response: opens a small panel to pick another bound axis (the other side
first: Thrust Left offers Thrust Right). It copies the settings shown (dead zone, saturation X/Y, curvature or
the user curve, slider and the game's own settings) to the same games or aircraft of that axis (the ticked ones).
From the code The other bound axes, picked again each time the copy opens (binds change on the way).
Tooltip Off: the other axis keeps its own invert (left and right often differ there)
Copy invert too in Copy to another axis: off, the other axis keeps its own invert (left and right often differ
there); on, it gets this axis's invert as well.
Copy in Copy to another axis: writes the settings to the picked axis in one step, engine binds tuning set for
the other relation with the same --scopes. One Ctrl+Z takes it back; this axis keeps its values.
Switches detent mode on or off for this throttle relation (engine binds detent set --on/--off). On: per aircraft
the curve is bent so your device's detent is where that aircraft's afterburner starts. In the game: after the
export, the afterburner starts exactly at the detent in every aircraft.
#Aircraft without afterburner: full power at the detent
Check boxwritten
Tooltip An aircraft without afterburner has nothing behind the detent, so it reaches full power there; otherwise you would have to push through the detent for the last part. Off: its curve runs over the whole travel.
Detent mode: ticked (the default), aircraft without afterburner get full power at the detent: they have nothing behind
it, and otherwise you would have to push through the detent for the last part. Off: their curve runs over the whole
travel. Saved in the profile at once (--no-ab full|linear). In the game: how far you
push those aircraft's throttle for full power.
From the code Aircraft without afterburner: true = full power at the detent, false = the relation's curve.
Tooltip Move the throttle to idle, to the detent and to full; JoyPro reads the device live. Stored for this device axis, for every throttle relation on it.
Calibrate detent... walks you through idle, the detent, full and (optional) the cut-off behind idle while JoyPro
reads the throttle axis live. Needs the relation bound to a device axis. Nothing is stored until Save calibration.
Tooltip Your per-aircraft throttle relations on one device axis become one relation in detent mode (preview first, undo afterwards).
Merge my throttle relations... looks for per-aircraft throttle relations on one device axis and shows a merge plan
per axis. Untick relations to keep them apart. Nothing changes until Merge; Undo merge takes it back. Engine: engine binds detent merge.
Calibration: takes the throttle's live position for the shown step (idle, detent, full, cut-off) and goes to the
next step. Refuses positions that cannot be right (the detent at idle, "full" not beyond the detent).
Merges the ticked throttle relations of this proposal into one relation in detent mode (engine binds detent merge --relations ... --apply); unticked ones stay apart:
the first relation keeps its bind and curve, gets the other relations' aircraft (each with its old afterburner point)
and the others are removed. One history version.
Tooltip Every aircraft of this group gets this afterburner start; empty = the game data.
Detent mode, an aircraft group: Set gives every aircraft of the group the afterburner start you typed, in % of the
game's throttle (1..100); empty goes back to the game data. Engine: engine binds detent set--target. In the game:
the afterburner starts at your detent for these aircraft.
From the code A group's afterburner start typed in % (or empty: back to the game data) for every aircraft of the group.
Tooltip Back to the afterburner start JoyPro's game data has for these aircraft.
Detent mode, an aircraft group: Game data removes your own afterburner values of these aircraft; they use the
start JoyPro's game data has. Engine: engine binds detent set.
From the code A group back to what the game data says (its own values removed).
Axis only: the axis works the other way round. Saved with Set Bind (--inverted). DCS and IL-2 store it per
axis bind; other games get it through the axis tuning.
Axis only: a one-sided axis without a centre (throttle, brake, slider). Saved with Set Bind (--slider). In the
game: DCS's "Slider" option, IL-2's one-sided axis.
Marks the bind as a double tap. Kept in the profile only (no game reads it from JoyPro's export); useful as a note
for cheat sheets and for virtual functions.
#In all relations (otherwise only if exactly one relation uses it)
Check boxwritten
With Unbind: frees the input in every relation that uses it. Off: only when exactly one relation uses it, so
nothing shared is removed by accident (--all).
Frees the typed physical input (device optional: empty = that input on any device; game optional) in the whole
profile (engine binds unbind). In the game: no relation is on that button after the next export.